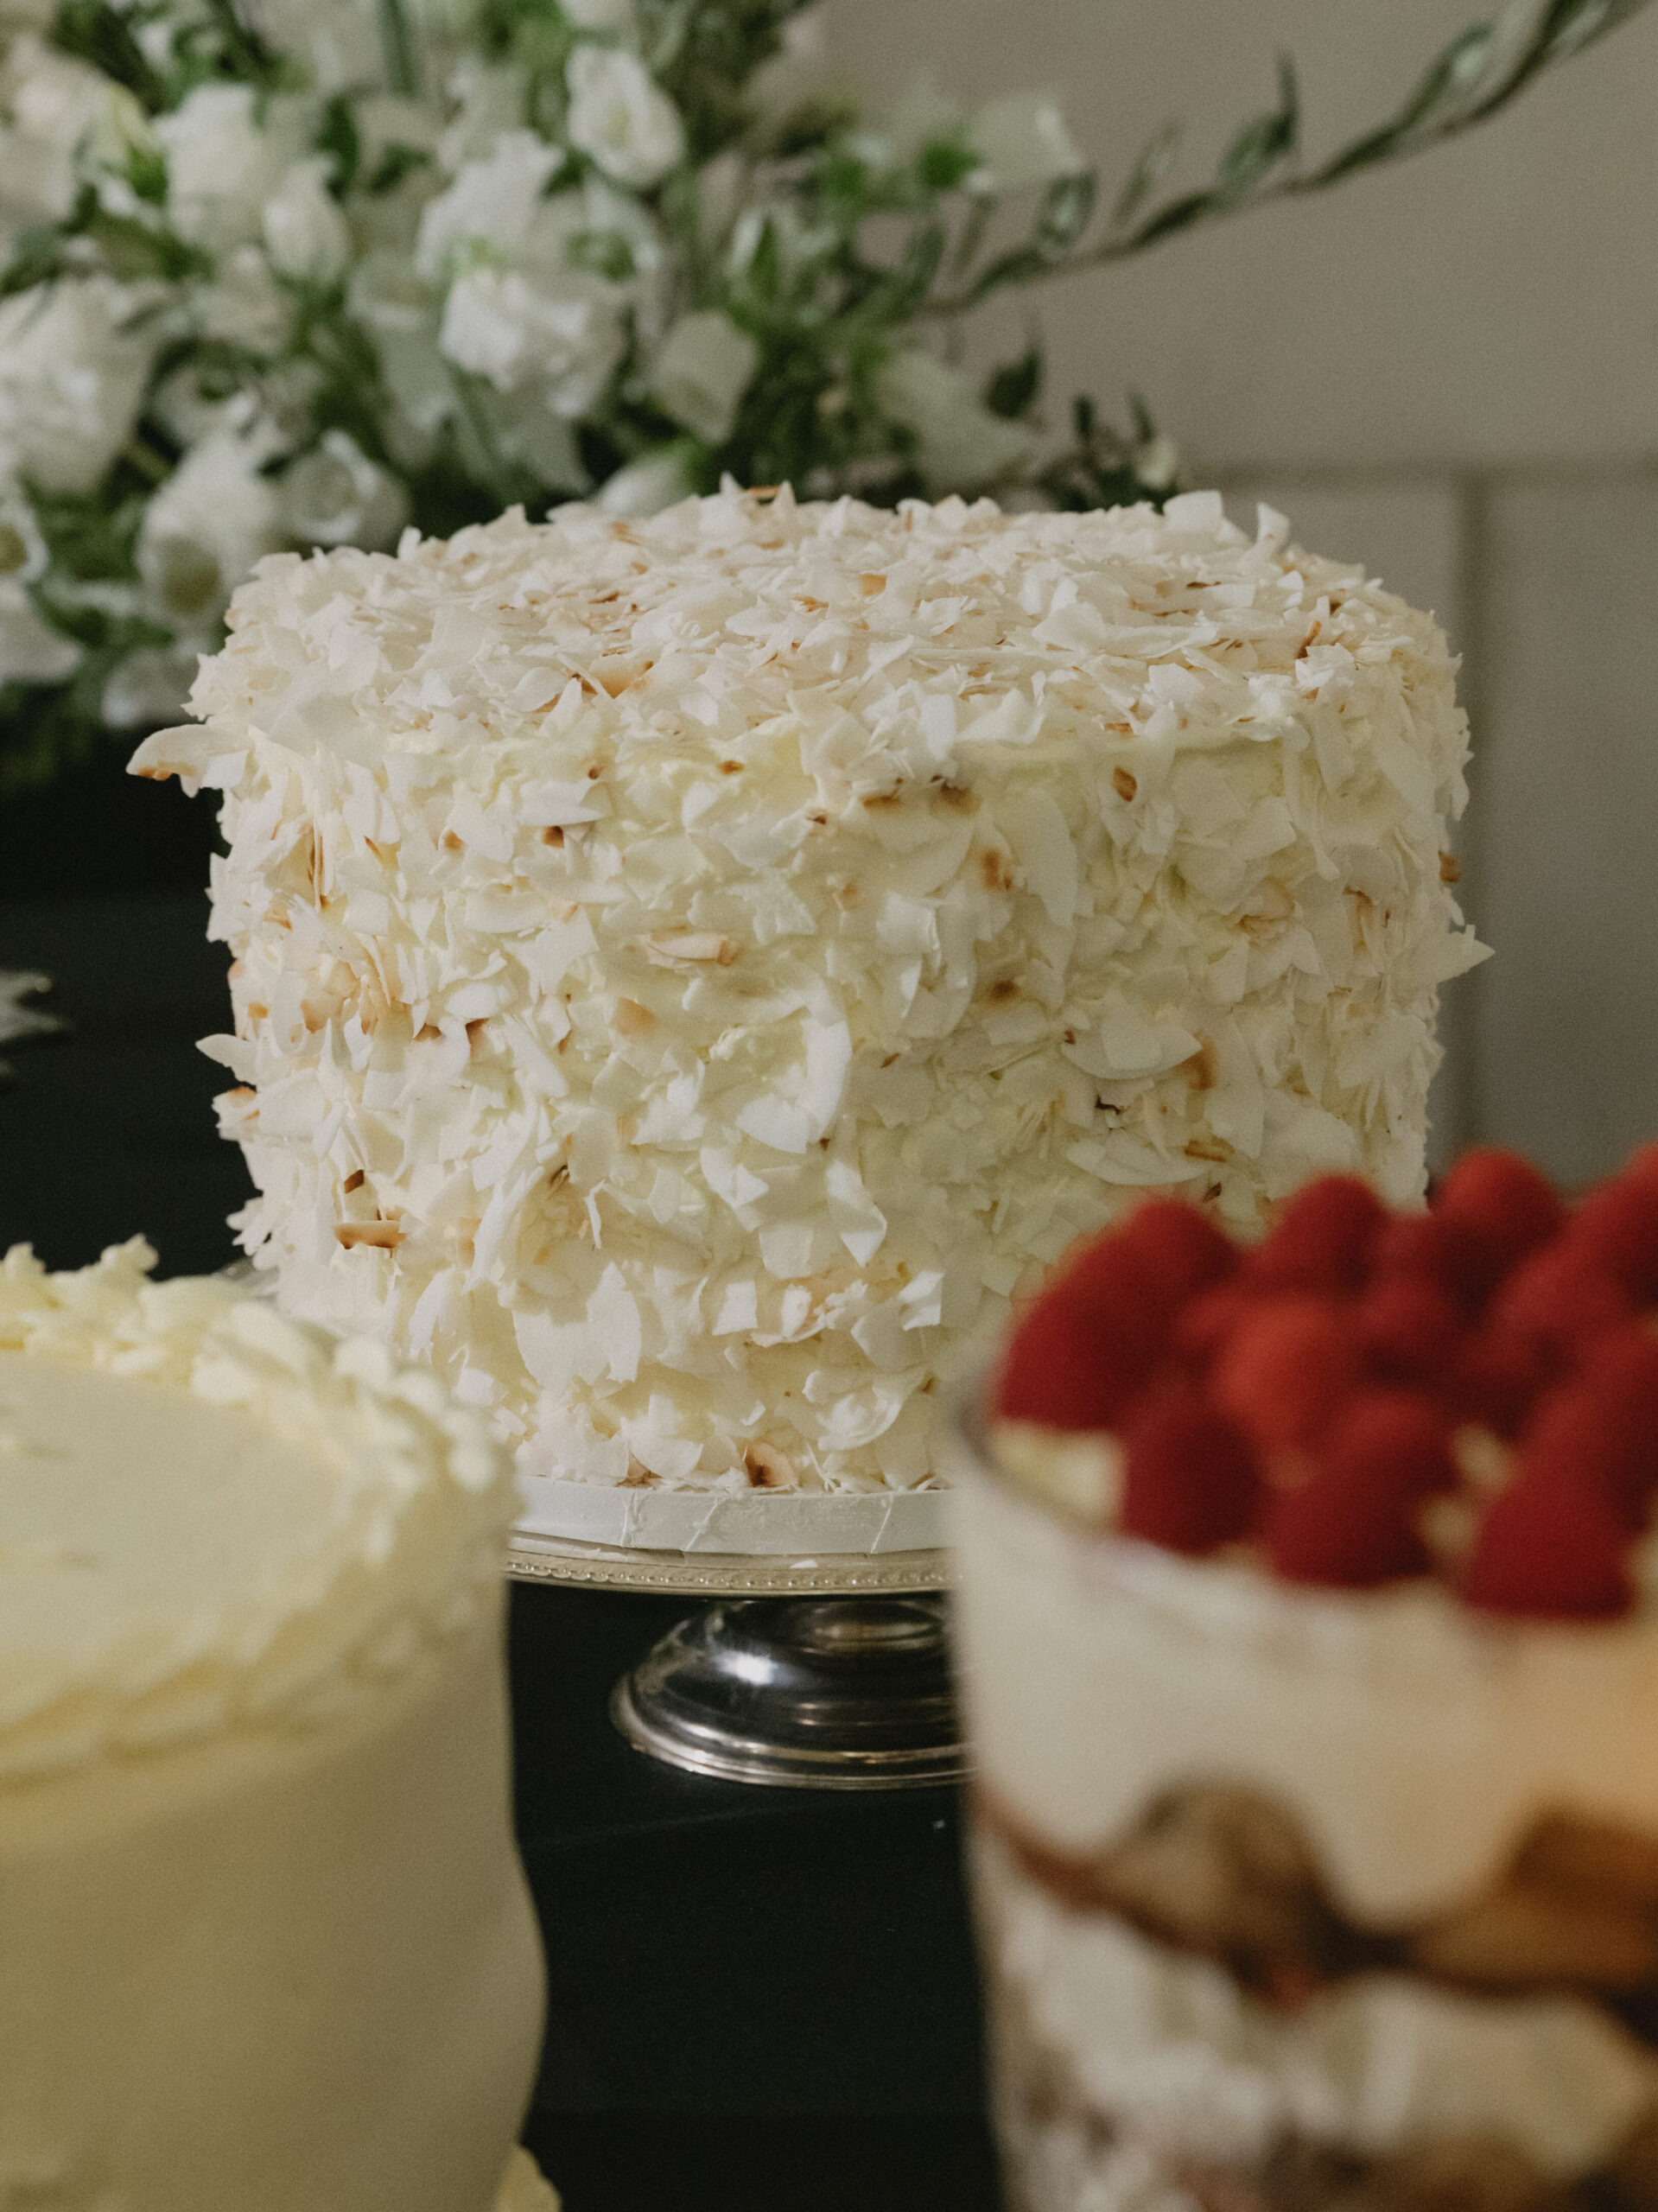
You might have been following along on my journey of making my wedding cakes this spring. It was a wild ride, and I started out using other written recipes, until I realized that it was my wedding, and I knew I wouldn’t be fully happy unless I developed all the recipes myself. So it took me a *bit* of time and a *bit* of crazy, but I’m finally rolling out all my wedding cake recipes! Starting with this Malted Coconut Cake with Mango Yuzu Curd. And trust me – she is goooooood.
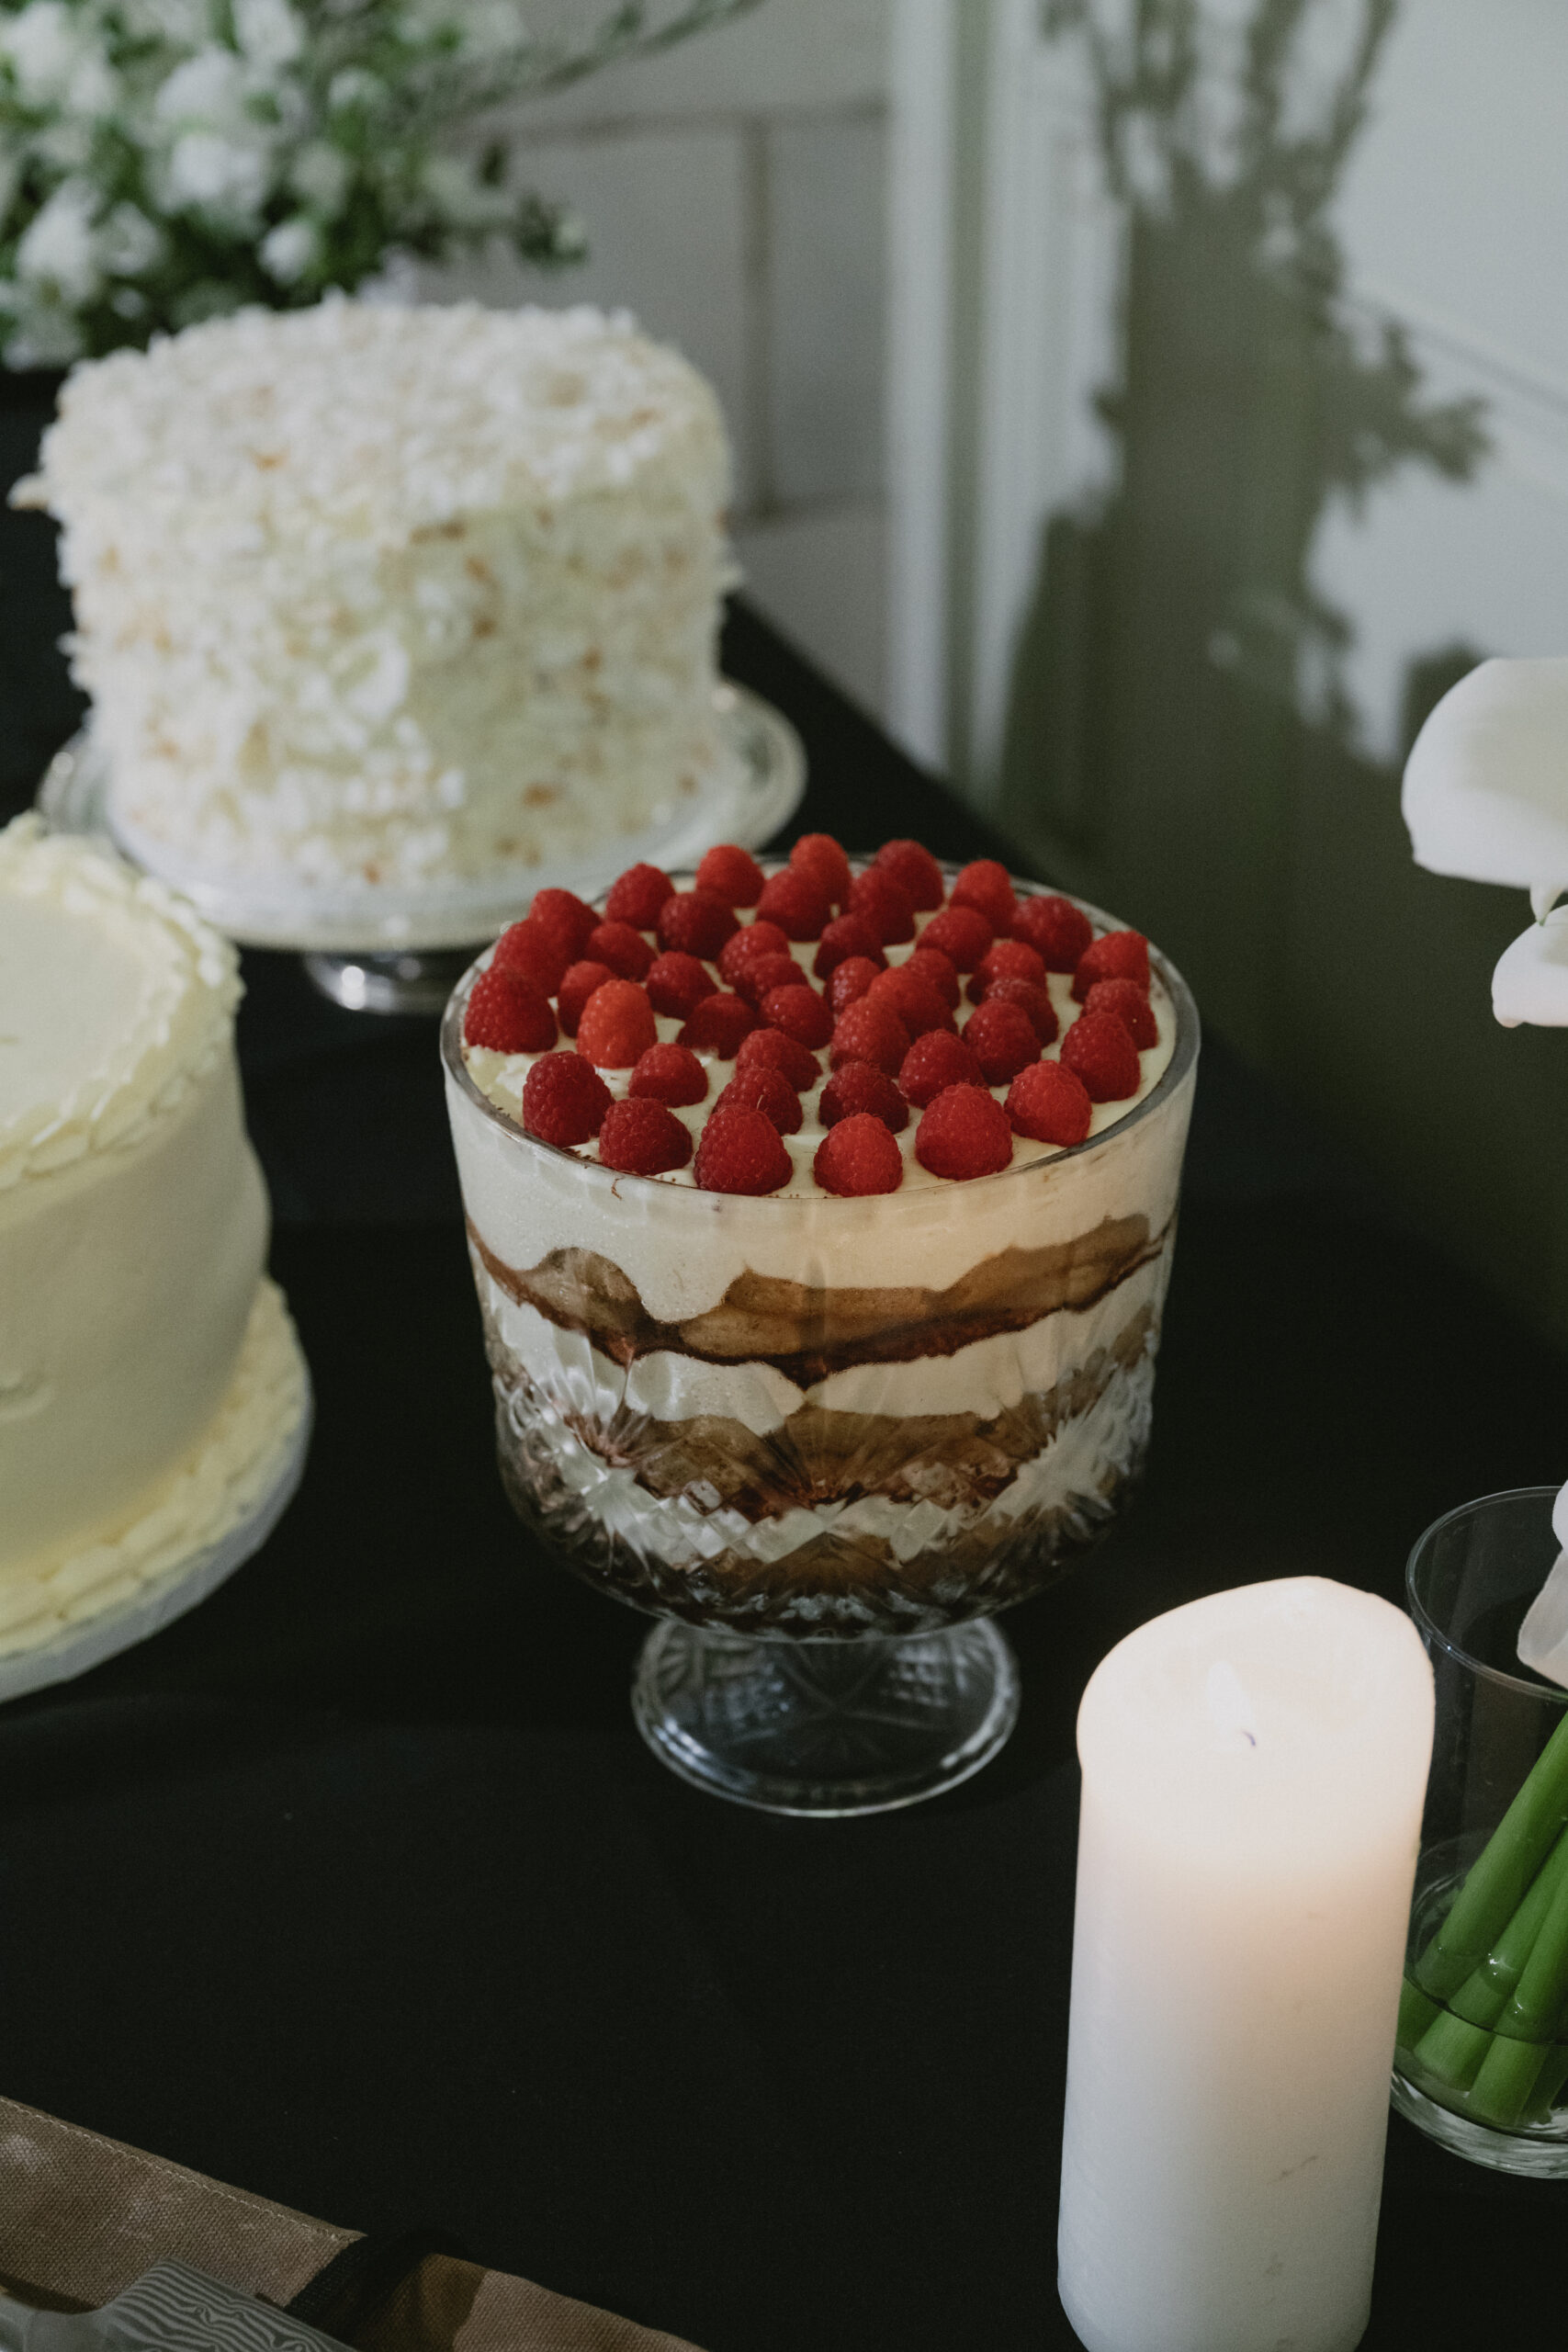
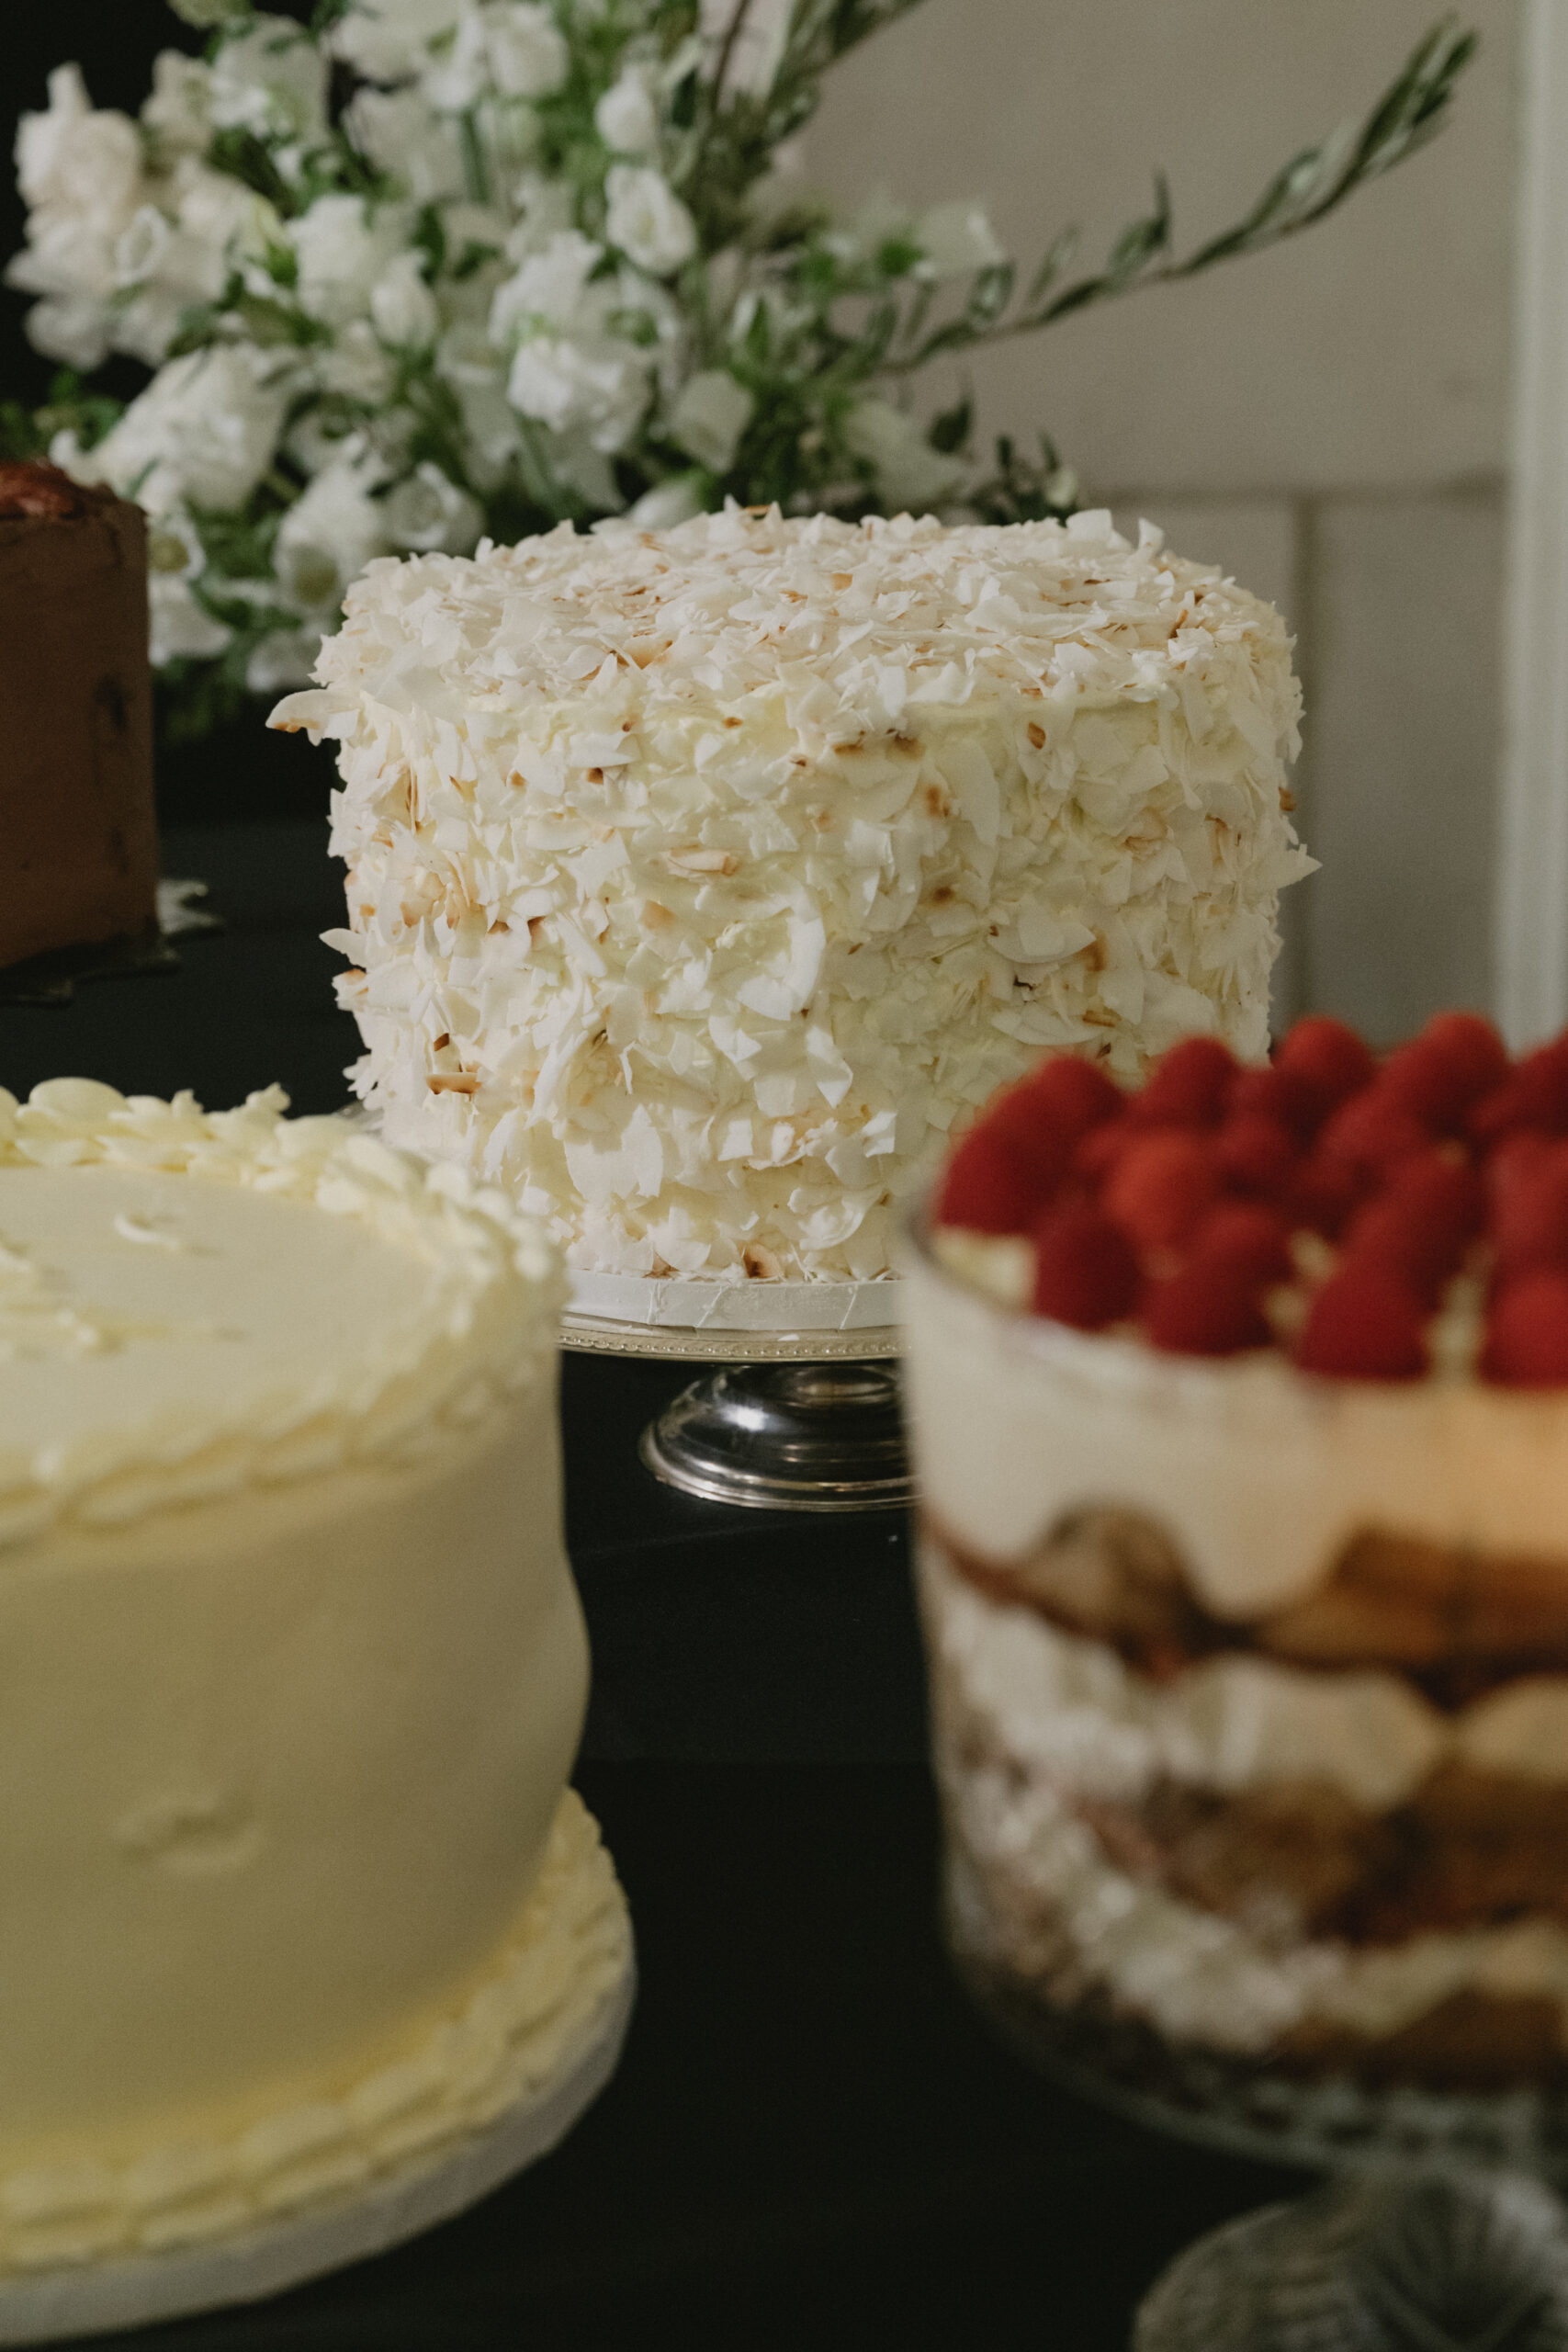
For my wedding, I did four individual cakes because I couldn’t imagine stacking tiers. I did:
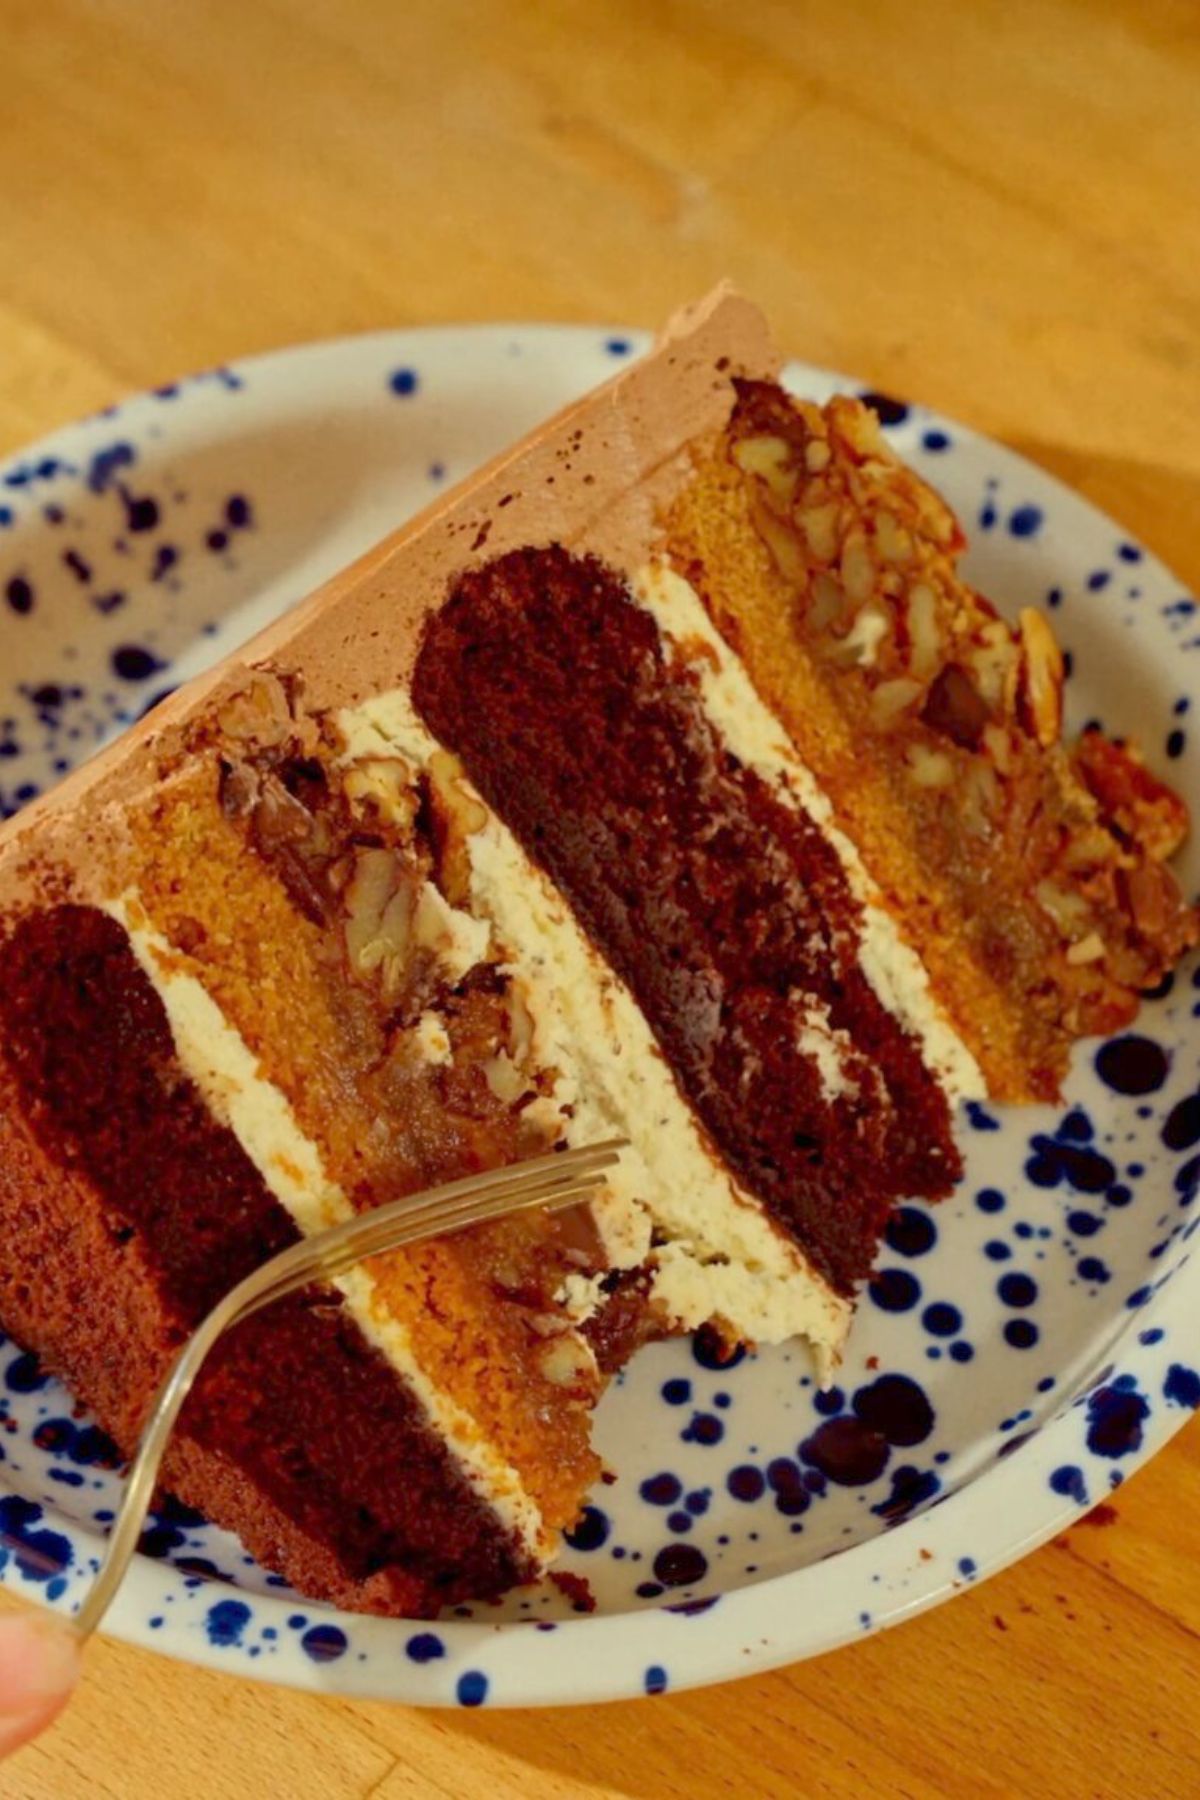
- Something Old – the Chocolate Bourbon Pecan Pie Cake, which is a mixture of my husband’s 30th birthday cake recipe and the pecan pies we make every holiday.
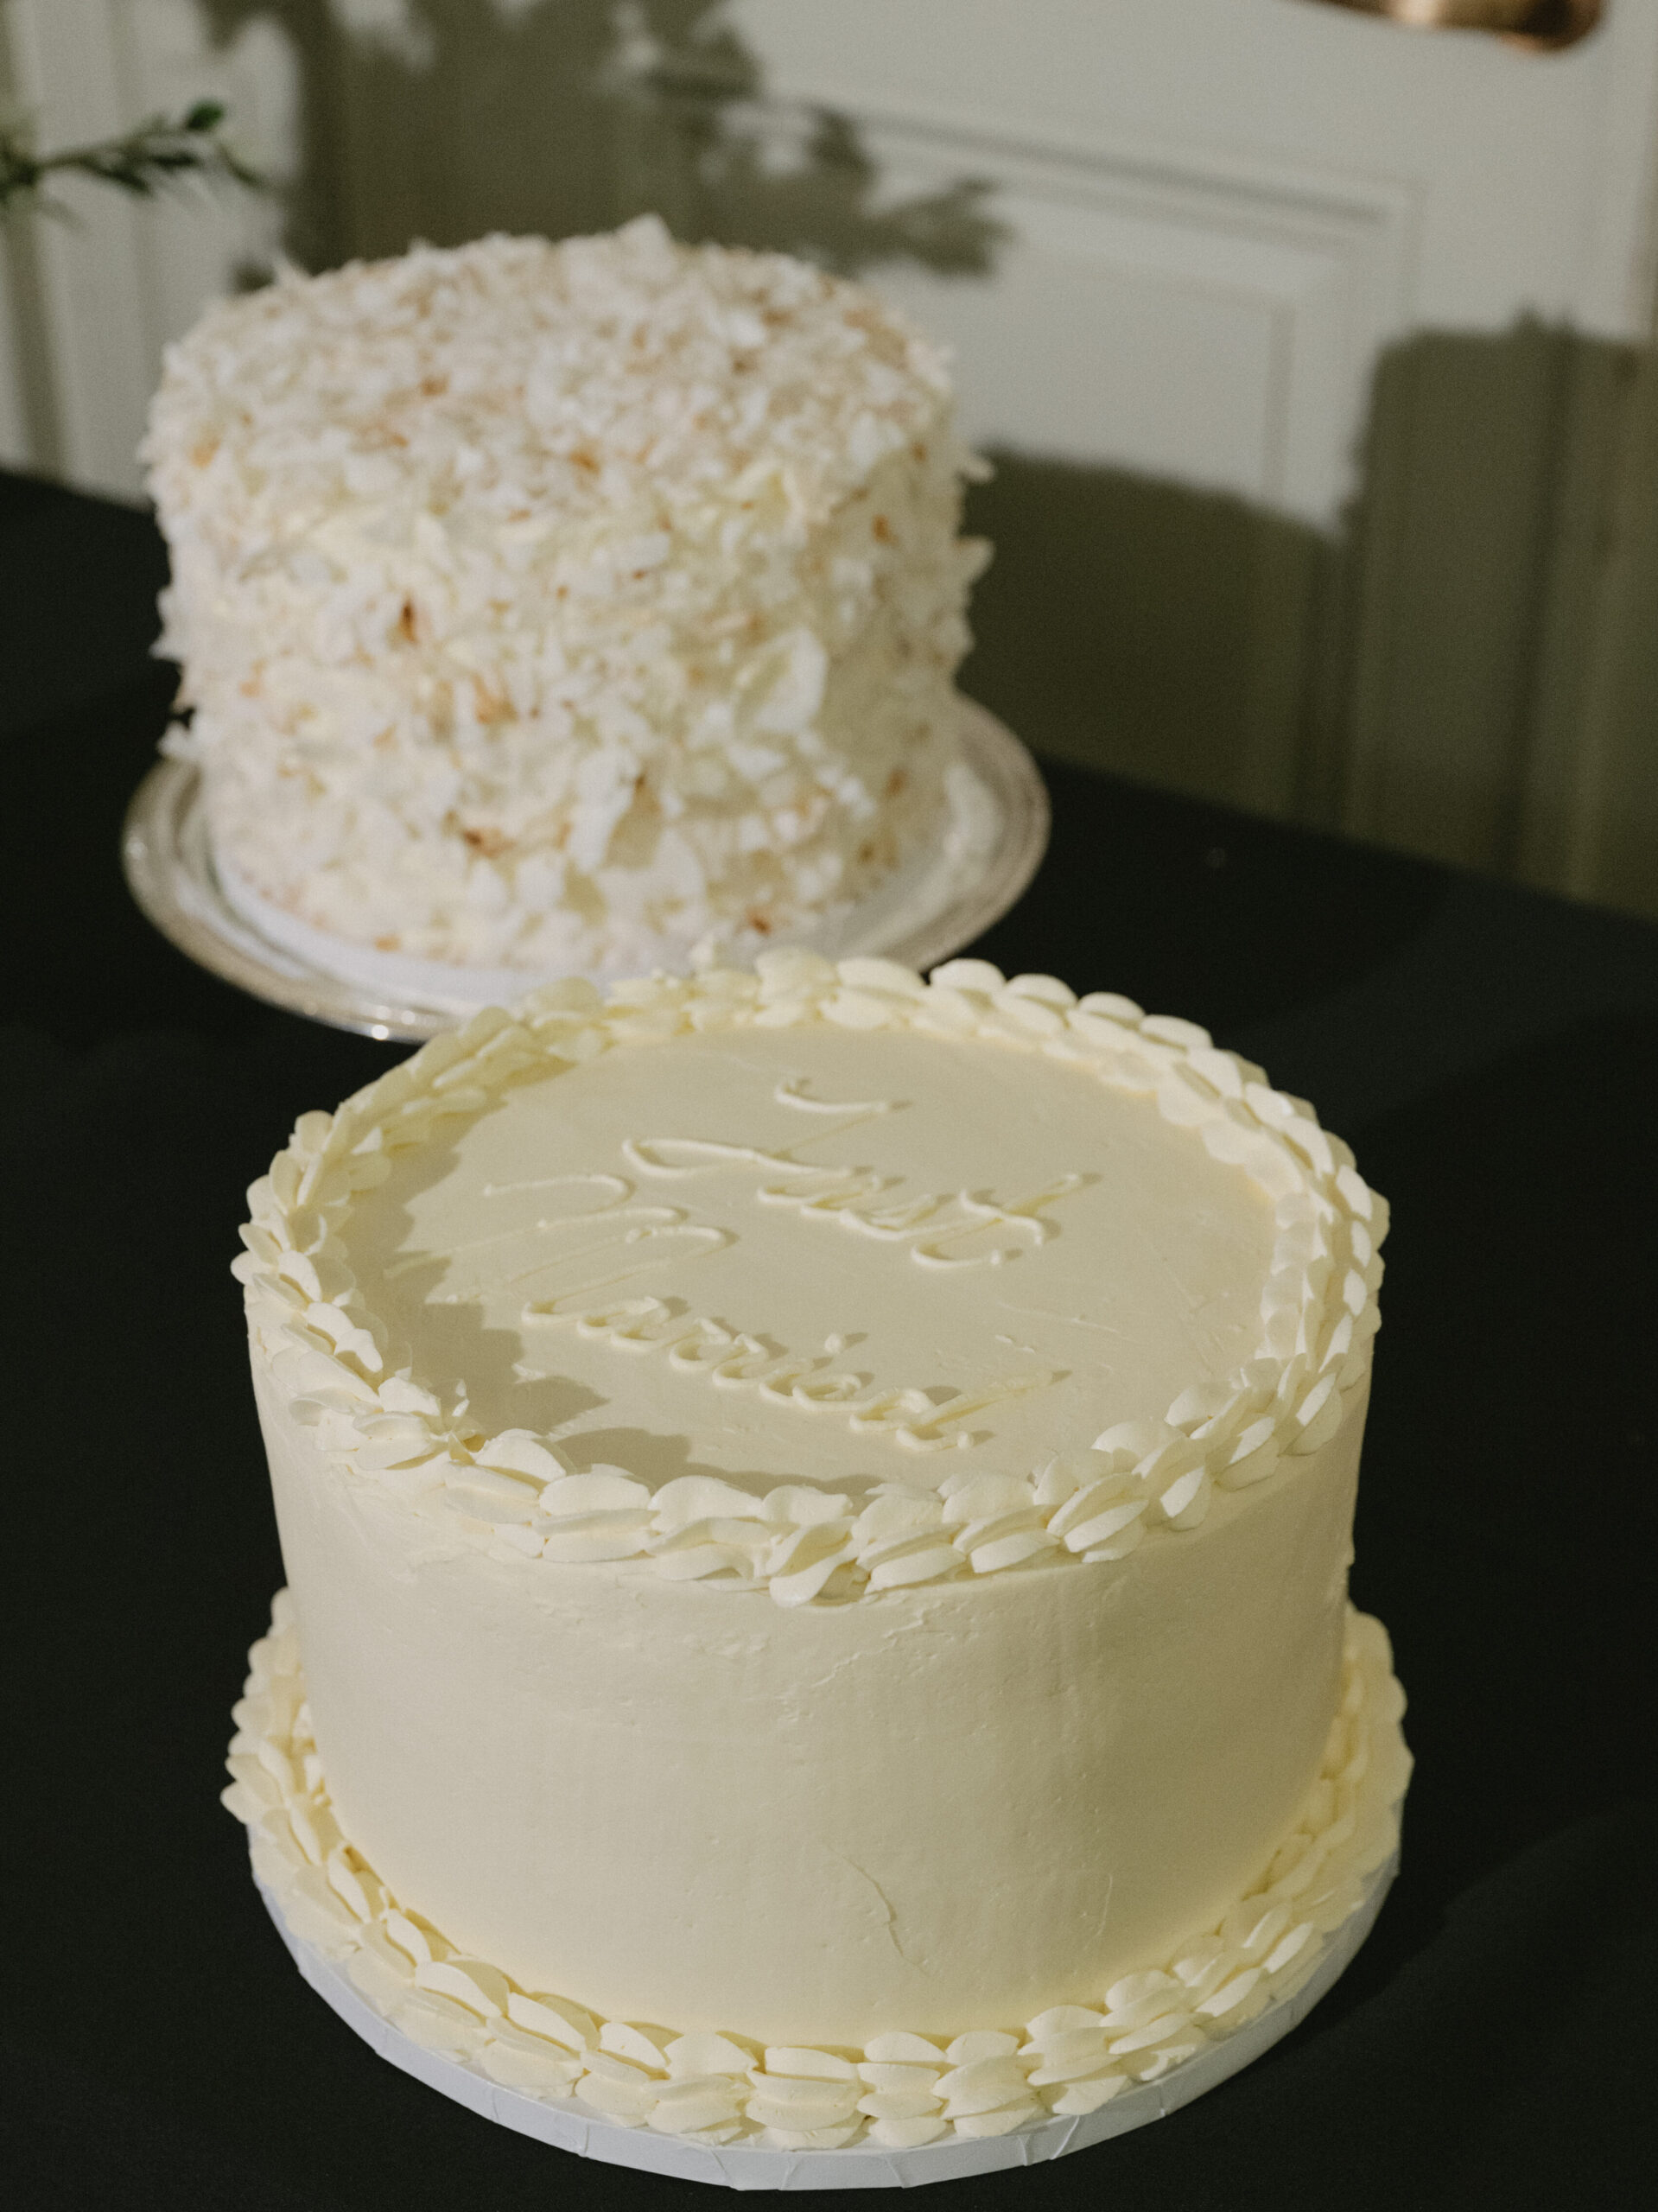
- Something New – this coconut cake!
- Something Borrowed – Hummingbird Cake, which was the cake flavor at my sister’s wedding.
- And Something Tiramisu – because we love tiramisu.
All of these recipes were for my wedding, but they are suitable any time! If you have a party, a birthday, or a gathering coming up, I would love for one of these cakes to make your list. They are all showstoppers in their own unique way.
Table of contents
- But why make THIS malted coconut cake?
- The batter of it all
- How to make the cream cheese frosting
- The best way to crumb coat a layer cake
- My suggested timeline for this malted coconut cake
- Storage suggestions for this coconut cake (both sliced and whole!)
- Why is this recipe in grams?
- Watch the full recipe here
- Looking for other wedding cake ideas?

But why make THIS malted coconut cake?
Oh god, there are so many reasons to love this cake, I’ll try to break them down.
Tender malted coconut cake layers – I have very high criteria for cake tenderness, and this one nearly melts in your mouth due to the addition of malted milk powder, which is an ingredient that makes everything taste like ice cream.
A salty-sweet coconut crunch layer – Before you tell me a crumble layer in your cake is weird, you have to try this. A crunchy mixture of rice flour and coconut flakes breaks up the tenderness of the cake, giving you a surprise of a mouthfeel that is delightful. More crumbles in cakes, please!
A tangy mango-yuzu curd – We all need a bit of acid to brighten up any sweet cake, and this curd is both tropical but sharp, making it the perfect balance in this coconut cake.
Cream cheese frosting that is NOT too cream-cheesey – You heard it here first, cream cheese frosting can get overwhelming. Not this one! It eats more like a vanilla frosting with the perfect balance of sharpness and salt. Trust me, it’s a cream cheese frosting anyone can love.

The batter of it all
This batter comes together in three steps.
The first step is steeping malted milk powder and coconut flakes together. It is essentially “blooming” the malted milk powder and melting the coconut, making the secret sauce of this recipe.
Tip: Make sure this is done first, so it has time to cool before you add it to the batter.
The next step is reverse creaming, meaning the flour and sugar go together first, and then you add butter a cube at a time, until the batter starts to look like a dough. This makes it so the cake is more tender than if you started with just the butter and sugar first. It’s a popular cake practice, and I love the result.
The third step is whisking together eggs and creme fraiche, which need to whisk together first before going into the batter. These two ingredients give the cake moisture and structure, but you need to introduce them to each other first before going into the recipe!
After that, it all combines into the smoothest batter you’ve ever seen.

How to make the cream cheese frosting
I use the term “cream cheese frosting” loosely, because it really eats more like a tangy vanilla frosting, and it’s the perfect balance for all the flavors in this coconut cake!
To make it, I’ve had to learn a few frosting tricks:
- Make sure the butter is softened, and whip that first. You can’t just chuck the cream cheese and the butter together in the bowl, they both need their separate time to whip. Beat the butter first, then add the cream cheese a piece at a time.
- Whisk the powdered sugar in a bowl to the side. This will make your frosting clump-free without you having to sift it in. It’s a lifesaver for keeping your kitchen mess low!
- Let the sugar and butter whip together for a few minutes to achieve peak fluffiness. It might look combined, but taking that extra time to beat it a bit more after all your sugar is added will make your frosting so much fluffier and easy to spread.
The best way to crumb coat a layer cake
Decorating feels intimidating, but it’s really not. We just have to be able to accept a bit of imperfection, okay? WE WILL SURVIVE.
A crumb coat is the thin, base layer of frosting that locks in loose crumbs so your final cake is easy to decorate. Here’s how I learned to crumb coat my cakes, and it was a lifesaver at the wedding.
- Start with a chilled cake:
I suggest assembling your cake and then letting it chill for several hours (ideally overnight). Cold layers are sturdier and won’t shift around as you frost. Plus it gives the cake time to set. - Use a turntable (if you have one):
A rotating cake stand makes the process easier, or you can use a surface you feel comfortable rotating on your counter. - Seal the edges first:
After stacking and layering your cake, start by “sealing” the outer edges. Use a small offset spatula to press frosting into any gaps between layers to trap the filling inside. - Start from the top, and go down to the edges:
Apply a large scoop of frosting to the top of the cake and ease it out to the edges. Then gently press over a very thin layer of frosting and swoop it all over the cake — just enough to catch the crumbs. Don’t worry if it looks messy! You’re not aiming for perfection here, just coverage. - Hot water to finish:
For a super smooth finish, dip your angled spatula in hot water, shake off any drips but leave it damp, and then glide it over the frosting. Do this only at the very end for a very clean-line finish. - Chill again:
Pop your crumb-coated cake into the fridge for at least 30 minutes, or until the frosting is firm to the touch. This step ensures the final layer of frosting goes on easily.
Tip: If you want ultra-clean edges, especially for wedding-style cakes, go slow and switch between an angled spatula and a bench scraper for the sides while rotating the cake.
My suggested timeline for this malted coconut cake
I suggest this cake as a three-day project, but ONLY to make it less stressful on you. If you are comfortable dedicating a bit of time on Day 1, you can easily make this a two-day endeavor. Here is my suggested timeline for making this cake:
For a three-day process:
Day 1 (or whenever): Make the coconut crumble and mango yuzu curd. Store in the fridge for up to 5 days before you need to use them.
Day 2: Bake the coconut cake layers and let them cool while you prepare the frosting. Assemble the cake then move it to the fridge to chill.
Day 3: Do the crumb coat in the morning, then the final decoration at night.
To make this a two-day process:
Day 1: Make the coconut crumble and mango yuzu curd, chill while you bake the cake layers. Let the cake layers cool while you prep the frosting. Assemble the cake that night and put it in the fridge to chill.
Day 2: Do the crumb coat in the morning, then the final decoration at night. Serve that night at a party, if you’d like!
Storage suggestions for this coconut cake (both sliced and whole!)
Let’s talk leftovers—because this cake deserves to stick around a little longer.
If the cake is still whole:
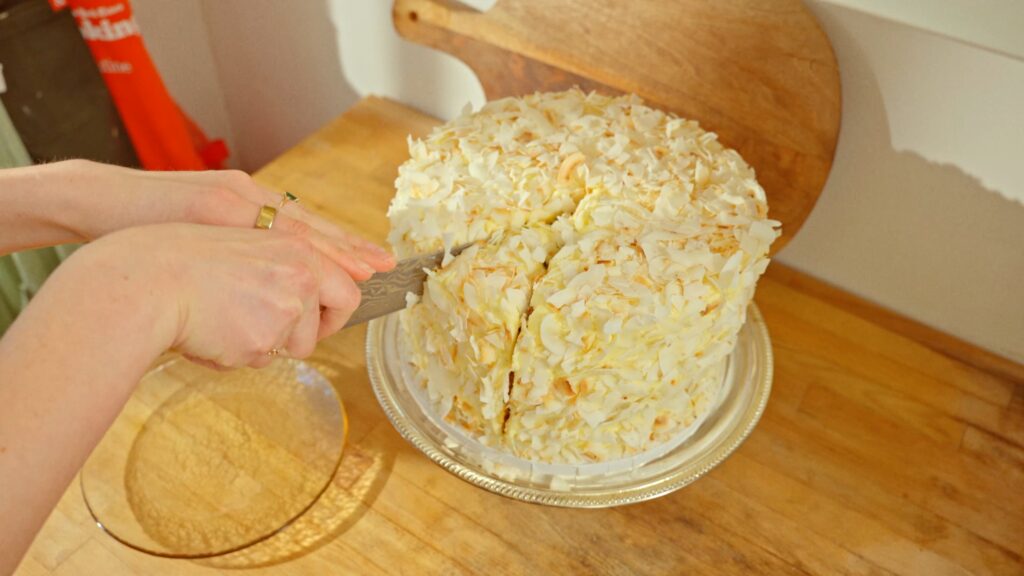
Wrap the cake loosely in plastic wrap or a cake dome and store it in the fridge. For extra security, I sometimes put it in a cardboard box. It’ll keep beautifully for up to 5 days. The frosting helps lock in moisture, so it stays tender and rich. If you want the cleanest slices, slice it straight from the fridge. It tastes delicious cooled or at room temperature.
Tip: If you made this ahead of time and haven’t decorated it yet, you can keep the crumb-coated cake in the fridge for up to 2 days before finishing the frosting and coconut. I suggest 24 hours for peak freshness, but there is wiggle room!
If the cake is sliced:
Store slices in an airtight container in the fridge for up to 5 days. I like to place a piece of parchment or wax paper between slices if stacking, just to protect the layers and the frosting. Plus, it makes it easy to pop in and just grab a slice!
And yes—you can freeze it:
Wrap individual slices tightly in plastic wrap, then a layer of foil, and freeze for up to 4 months. To thaw, just pop a slice in the fridge overnight or let it sit at room temp for about 30–45 minutes. It’s a surprisingly fantastic treat to find in the freezer on a random Tuesday.
Why is this recipe in grams?
Grams is always my preference for baking, and I hope it will be yours, too. The only way to ensure complete accuracy is through measuring by weight, not volume. One cup of flour can weigh all the way from 120 grams to 160 grams, depending on how it was packed. This ends up causing some volatility and miss-matched results.
I want to ensure you get the best results with this recipe (and I want to keep this recipe fool-proof!) so I highly recommend getting a small affordable kitchen scale if you want to move forward with this particular recipe.
Watch the full recipe here
Looking for other wedding cake ideas?

A Party-Sized Hummingbird Cake
Raspberry Tiramisu
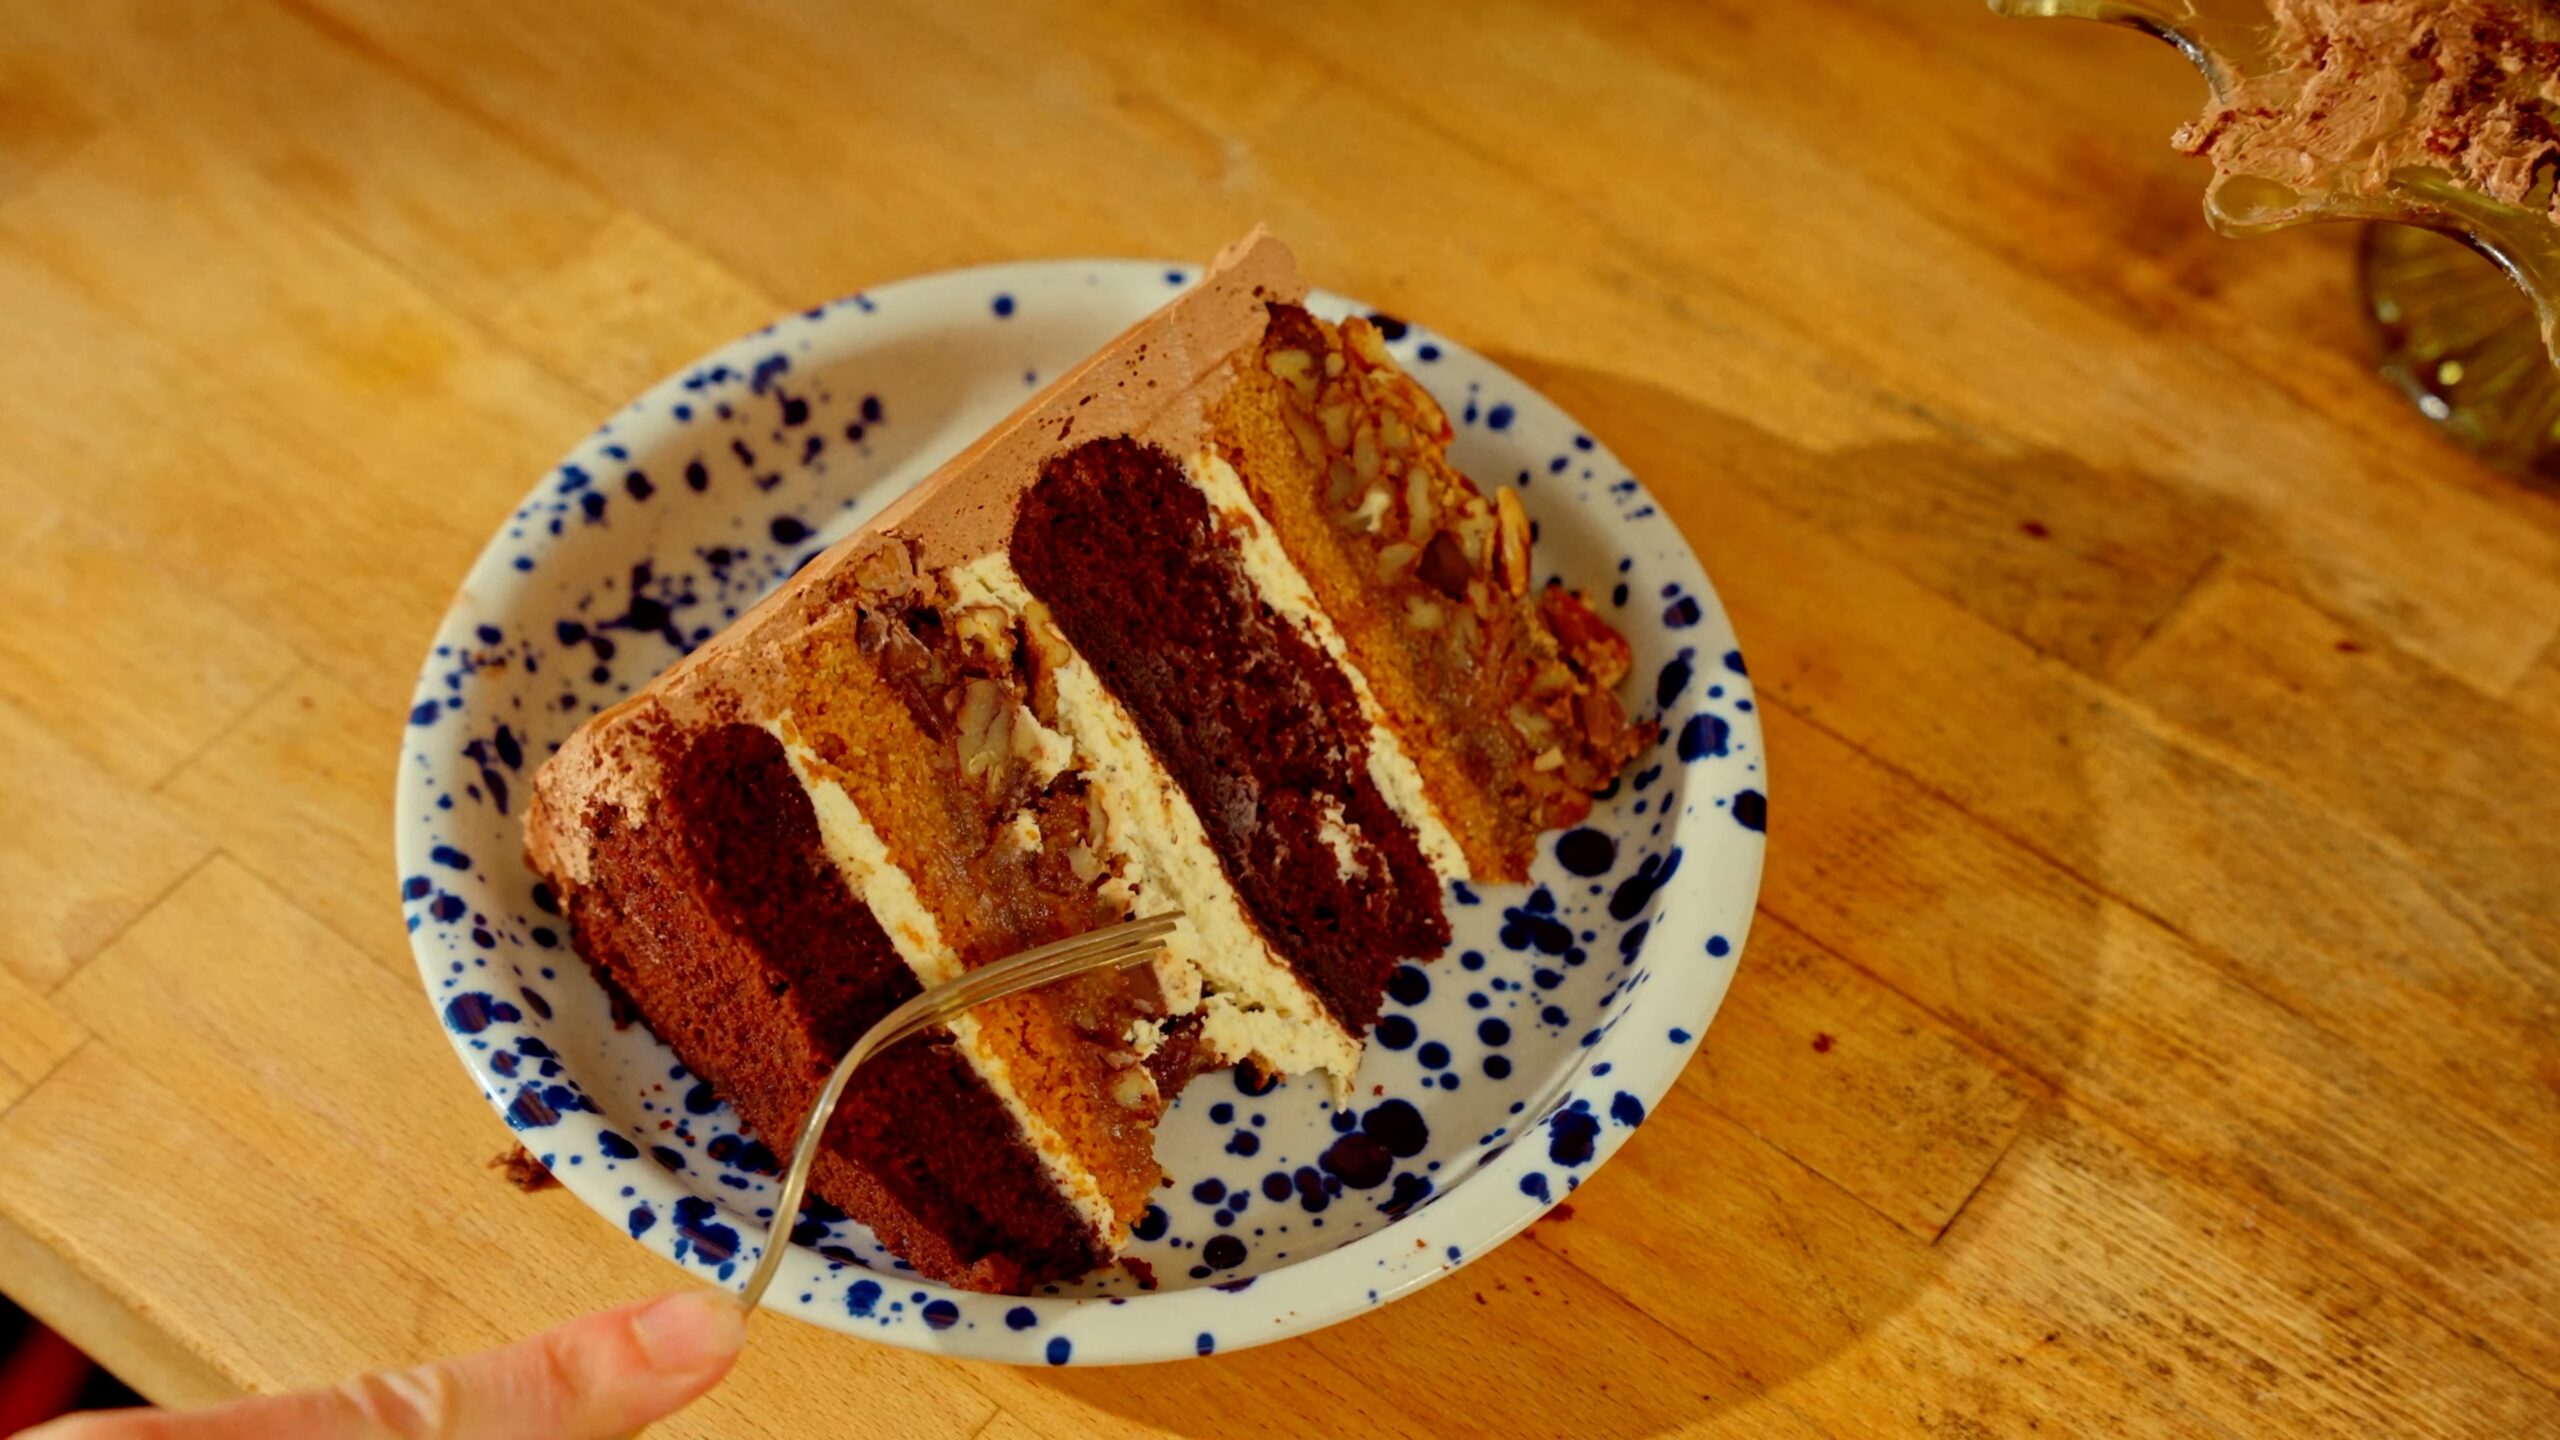
Chocolate Bourbon Pecan Pie Cake
And that’s it for this Malted Coconut Cake!
If you make it, please tag me on Pinterest or Instagram so I can see! It’s my favorite thing to scroll through stories and see what you all are making.
And of course feel free to leave any questions, comments or reviews! This is the best place to reach me, and I’d love to hear from you <3
Equipment
- 1 whisk
- 1 kitchen thermometer
- 4 9-inch springform cake pans
- saran wrap
- plastic bag or piping bag
- Angled spatula, for icing
Ingredients
For the coconut crumble
- 2 cups (300g) rice flour
- 3/4 cup (150g) granulated sugar
- 2 teaspoons Diamond Crystal kosher salt
- 1/4 cup (50g) unsweetened coconut flakes
- 1/2 cup (120g) coconut oil, melted
For the mango yuzu curd
- 2 large eggs
- 2 large egg yolks
- 1 1/2 cups (330g) very ripe mango, blended
- 3 tablespoons (48g) yuzu juice, divided
- 1 cup (200g) granulated sugar
For the coconut cake layers
- 1 cup (60g) unsweetened coconut flakes
- 1 cup (120g) malted milk powder
- 2 cups (474g) boiling water
- 3 cups (660g) granulated sugar
- 2 cups (240g) cake flour or pastry flour, sifted after measuring
- 2 cups (240g) all-purpose flour, sifted after measuring
- 1 cup (120g) unsweetened coconut flakes
- 2 1/2 teaspoons baking soda
- 1 1/2 teaspoons Diamond Crystal kosher salt
- 2 cups (452g) unsalted butter, softened
- 4 large eggs
- 4 egg yolks
- 1/2 cup (120g) grams crème fraîche
For the vanilla frosting
- 2 cups (452g) grams salted butter, softened
- 2 cups (452g) cream cheese, softened
- 7 1/2 cups (904g) grams powdered sugar
- 1 teaspoon Diamond Crystal kosher salt, plus more to taste
- 1 teaspoon vanilla extract
For decorating
- 2 cups (240g) unsweetened coconut flakes
Instructions
For the coconut crumble (see suggested timeline in Notes)
- Position a rack in the middle of the oven and preheat to 350°F.
- In a medium bowl, mix together the 300 grams of rice flour, 150 grams of granulated sugar, 2 teaspoons of kosher salt and 50 grams of coconut flakes. Drizzle in the 120 grams of coconut oil and mix together until it has the texture of wet sand and has formed a few clumps.
- Transfer this to a parchment-lined sheet pan. Bake for 10-12 minutes, stirring halfway through and removing when the mixture is very lightly golden.
- Let this cool to room temperature before storing in the fridge until you are ready to use it.
For the mango yuzu curd
- In a large heat-proof bowl, whisk together the 2 eggs and 2 egg yolks. Set this to the side.
- To a blend, add 330 grams of mango and blend into a purée. Add the blended mango to a pot over medium heat and whisk together with 2 tablespoons of yuzu juice and 200 grams of granulated sugar. Allow the mixture to come to a gentle bubble.
- Use a thermometer to monitor the temperature of the mango, and when it reads 200 degrees, scoop a spoonful (about 1/4 cup) of the mango mixture into the eggs.
- Whisk vigorously to temper the eggs. Repeat this step, adding spoonfuls at a time and whisking, until two thirds of the mixture is in with the eggs. Pour the egg mixture back into the pot, reduce the heat to low, and cook, whisking constantly to ensure no curdling occurs.
- Whisk constantly for 8-10 minutes, allowing the mixture to thicken until it can coat the back of a spoon. It should read between 170°F-180°F on the thermometer.
- Remove the curd from the heat, whisk in the remaining 1 tablespoon of yuzu juice, then transfer to a container and store in the fridge until you are ready to use it.
For the coconut cake
- First, use either a blender or food processor to blend 60 grams of coconut flakes into a powder. (Don't blend too much or you risk making coconut butter!)
- In a medium heat-proof bowl, combine the 120 grams of malted milk powder, 60 grams of blended coconut flakes and 474 grams of boiling water. Stir until everything has melted together and set to the side to cool.
- Preheat the oven to 350°F. Equally stagger two racks (we’re making a lot of cakes!).
- To the bowl of a stand mixer fitted with the paddle attachment, add 660 grams of granulated sugar, sift in 240 grams of cake flour and 240 grams of all-purpose flour. Blend 120 grams of coconut flakes then add it along with 2 1/2 teaspoons of baking soda, and 1 1/2 teaspoons salt to the bowl.
- With the stand mixer on low, add 452 grams of softened butter one piece at a time. The mixture will start to resemble a cookie dough. Turn off the mixer.
- In another bowl, whisk together 4 eggs, 4 egg yolks and 120 grams of crème fraîche until smooth. Turn the mixer to low and gradually pour this in.
- Increase the speed to medium-high and beat for 2 minutes, or until the batter is fluffy and light.
- Turn the mixer to low and slowly pour in the cooled malted mixture. Scrape down the sides of the bowl as needed. The batter will be on the thinner side, but don't worry, it will thicken up.
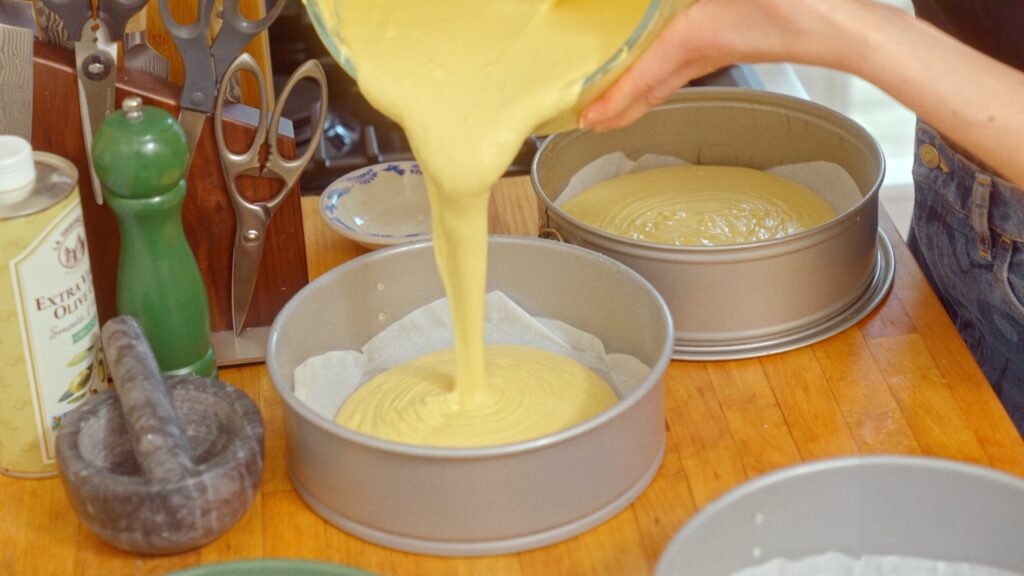
- Line four 9-inch cake pans with parchment paper. Evenly distribute the cake batter among them. Bake for 25-35 minutes, or until the cakes are golden on top.
- Let the cakes cool at room temperature, they will collapse into flat pieces, which is good for cake layering. If assembling the next day, wrap them with cling wrap and store them at room temperature. If you are assembling later than one day, wrap them and freeze them.
For the vanilla frosting
- In the bowl of a stand mixer fitted with the paddle (or in a bowl using an electric hand mixer), beat 452 grams of softened salted butter on medium-high speed for about 5-7 minutes, or until light, fluffy, and very spreadable.
- Add 452 grams of cream cheese a chunk at a time and continue to beat for 2-3 minutes, or until this looks like buttercream.
- In a separate bowl on the side, add 904 grams of powdered sugar. Whisk it to break up any clumps. With the mixer on low, add the powdered sugar one spoonful at a time, only adding the next once the first has mixed in. This helps avoid any sugar clumps.
- Add 1 teaspoon of kosher salt and 1 teaspoon of vanilla extract and continue to beat until very fluffy and smooth. Taste and season with more salt as desired.
To assemble the cakes
- Use one springform cake pan as your assembly zone. Line it with cling wrap, forming a big "X" with two pieces across the pan.
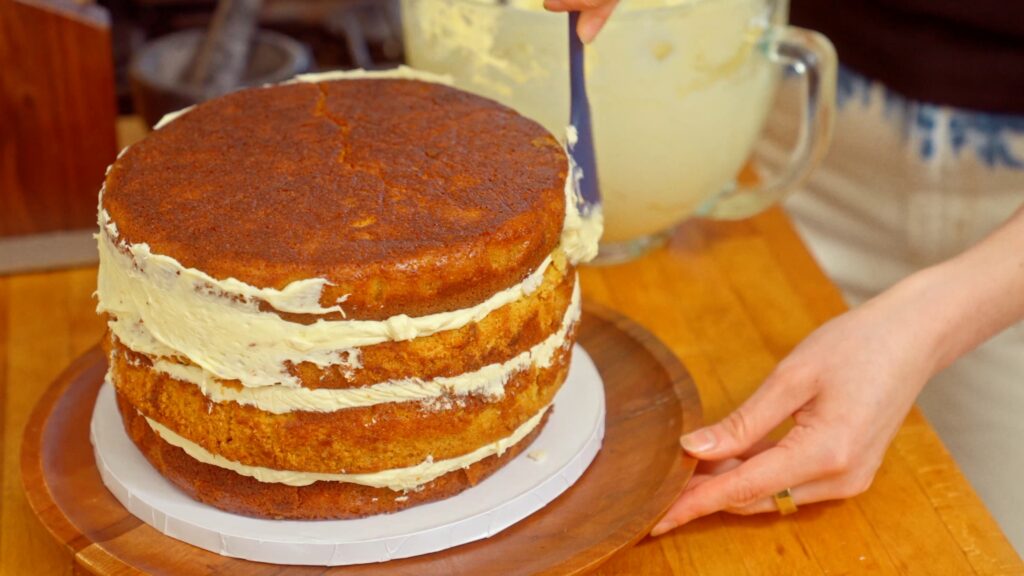
- Place the first coconut cake layer down in the lined pan. Layer it with a thin layer of the frosting. Use a piping bag to pipe a ring around the edge. Fill the center with 1/2 cup of curd. Sprinkle over 1/2 cup of the coconut crumble, or enough to seal in the curd. Layer another cake layer on top and repeat until all the cakes are layered.
- Use the cling wrap hanging over the edges to seal up the cake. Store this in the fridge in the 9-inch springform pan and let it set for 12-24 hours. You can speed this up, but the cake will slice a little softer, where a longer set time will give you a cake with nice, clean slices.
- The next day, flip the cake onto the surface you plan to decorate on. This can be a cardboard cake platform or the surface you plan to serve on.
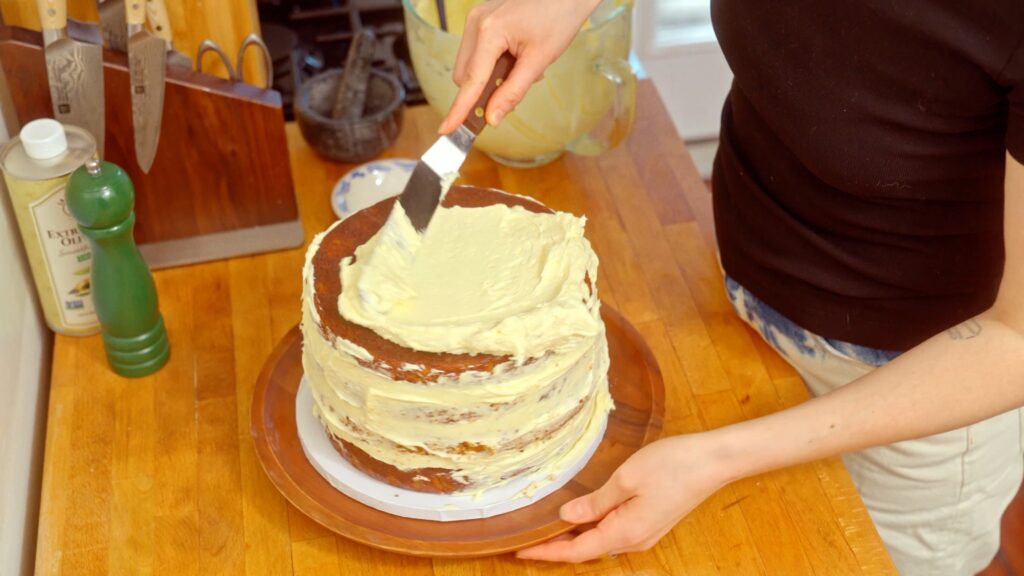
- Crumb coat the cake by first "sealing" up the exposed icing layers with frosting. Then add a generous dollop of frosting to the top and use an angled spatula to smooth it out. A hack here is to dip the spatula in hot water for your final smoothing, it will make a razor-sharp edge.
- Move this to the fridge to chill while you prepare the coconut. The longer it chills, the easier it will be to decorate, but try not to let it sit more than 24 hours.
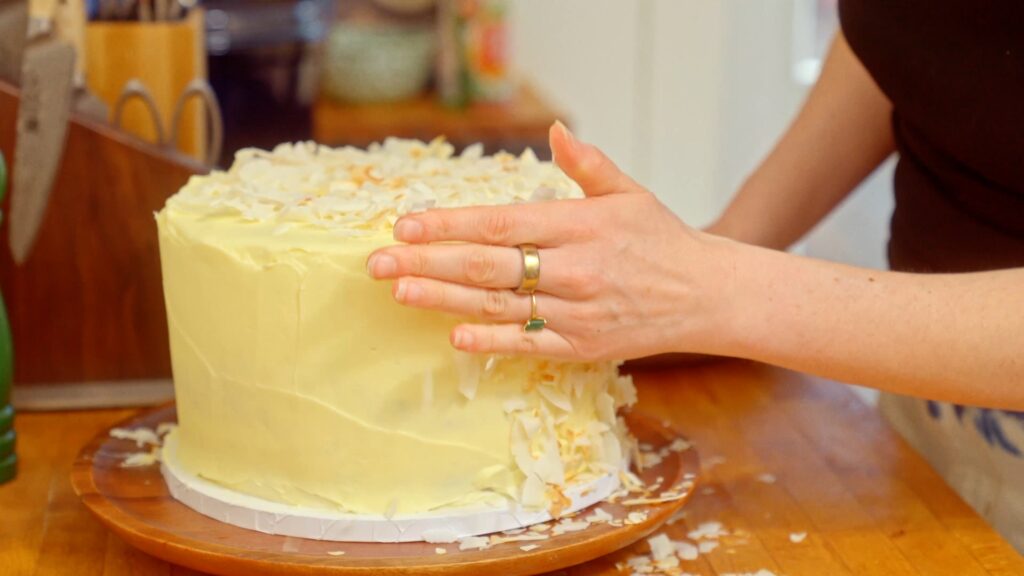
- Toast 240 grams of coconut flakes until they are just a bit golden on the edges. Set these aside to cool. Assess how much frosting you have. If you'd like more to top the cake, make another batch of the vanilla frosting listed above.
- Use the angled spatula to evenly spread out the remaining frosting. While it is still pliable, gently press the coconut flakes all over the cake. From there it is ready to slice and serve!


Comments
hi Justine!! congrats on your wedding – you and your cakes look absolutely *gorg*!! So appreciate you sharing these recipes, this coconut mango yuzu situation sounds so yummy for summer. Quick q – if I wanted to half this recipe, do you think three 8-inch pans would work? Also, for a half-size cake, do you think it’s necessary to still assemble using a springform pan? TY!!
Hi hi! I think three 8-inch pans sounds perfect! I’d recommend still assembling in the pan, because you’ll see these cakes are very tender. Plus it makes it much easier to wrap your cake and make sure your cake comes out level in the end!
Hi Justine, congratulations on your marriage and greetings from Poland! 🙂 This cake has been haunting my dreams ever since you first announced it. Unfortunately, malted milk powder is not a thing in (most of) Europe, so I’ve been quietly devastated. Especially, since the price of importing some is jaw-dropping.
My question: is there a way to make it yourself? It seems like it’s a mix of barley extract, flour and powdered milk, so seems fairly “easy” in theory, but I couldn’t find any reliable-looking recipes for the life of me. There are some e.g. on Reddit, but some mention wheat flour and others just malt powder and powdered milk. And proportions tend to be wildly different. Do you have any advice on this front?
Sending lots of love,
Ola
Hi Justine! Congrats on your wedding! I love your recipes (have made a couple and are delicious!!!) and want to make this one, however, here in Costa Rica we don’t have: yuzu, crème fraîche nor malted milk powder. Yuzu I figured a mixture of lemon and orange or mandarine, but for the crème and malted milk powder I have not a clear vision, do you think they can be replaced? Thank you 🙂
Hi Melanie,
I am so sorry for just seeing this! I’m sure you may have found a work around, but for creme fraiche the best substitute is sour cream. For malted milk powder, while there is no proper substitute, do you have access to powdered milk? I’m nervous to say it will give an exact result, but it will similarly!
I’ve made this cake three times now and each time it’s been a massive success! It halves very well and I’ve used a range of different sized cake tins and each time the layers have been so moist. I never made the curd (I’m not a curd girly) but the frosting and crumble layer were life changing.
I also made a few substitutions that worked out great. Normal flour for rice flour. Greek yoghurt for crème fraiche.
So good! I keep getting requests for making this cake again.
Made this for a dinner party and everyone agreed it is the best cake we’ve ever had in our whole lives. The textures really make this cake special. There are many components so the task may seem daunting, but they are all straight forward and 100% worth it. I halfed the recipe and baked it in 3 8” cake tins, and it was perfect! Also used regular flour instead of rice flour and skyr instead of crème fraiche
Stop it, that is music to my ears! I’m so glad you all loved it and that the swaps worked perfectly. Thanks so much for taking the time to leave a review.
Leave a Comment
Made this recipe? Tell me all your thoughts or if you’ve got any questions!