Servings: dinner rolls
Equipment
- 1 parchment paper
Ingredients
- 1 cup whole milk, 234 grams / 8 ounces
- 1/2 cup water, 117 grams / 4 ounces
- 1/4 cup granulated sugar, 55 grams / 1.9 ounces
- 2 1/4 teaspoon active dry yeast, 7 grams / 0.25 ounces
- 1 large egg
- 4 cups all-purpose flour, 530 grams / 19 ounces
- 1 tablespoon Diamond Crystal kosher salt, 12 grams / 0.4 ounces
- 1/4 cup salted butter, cubed, 57 grams / 2 ounces
For the seedy swirl
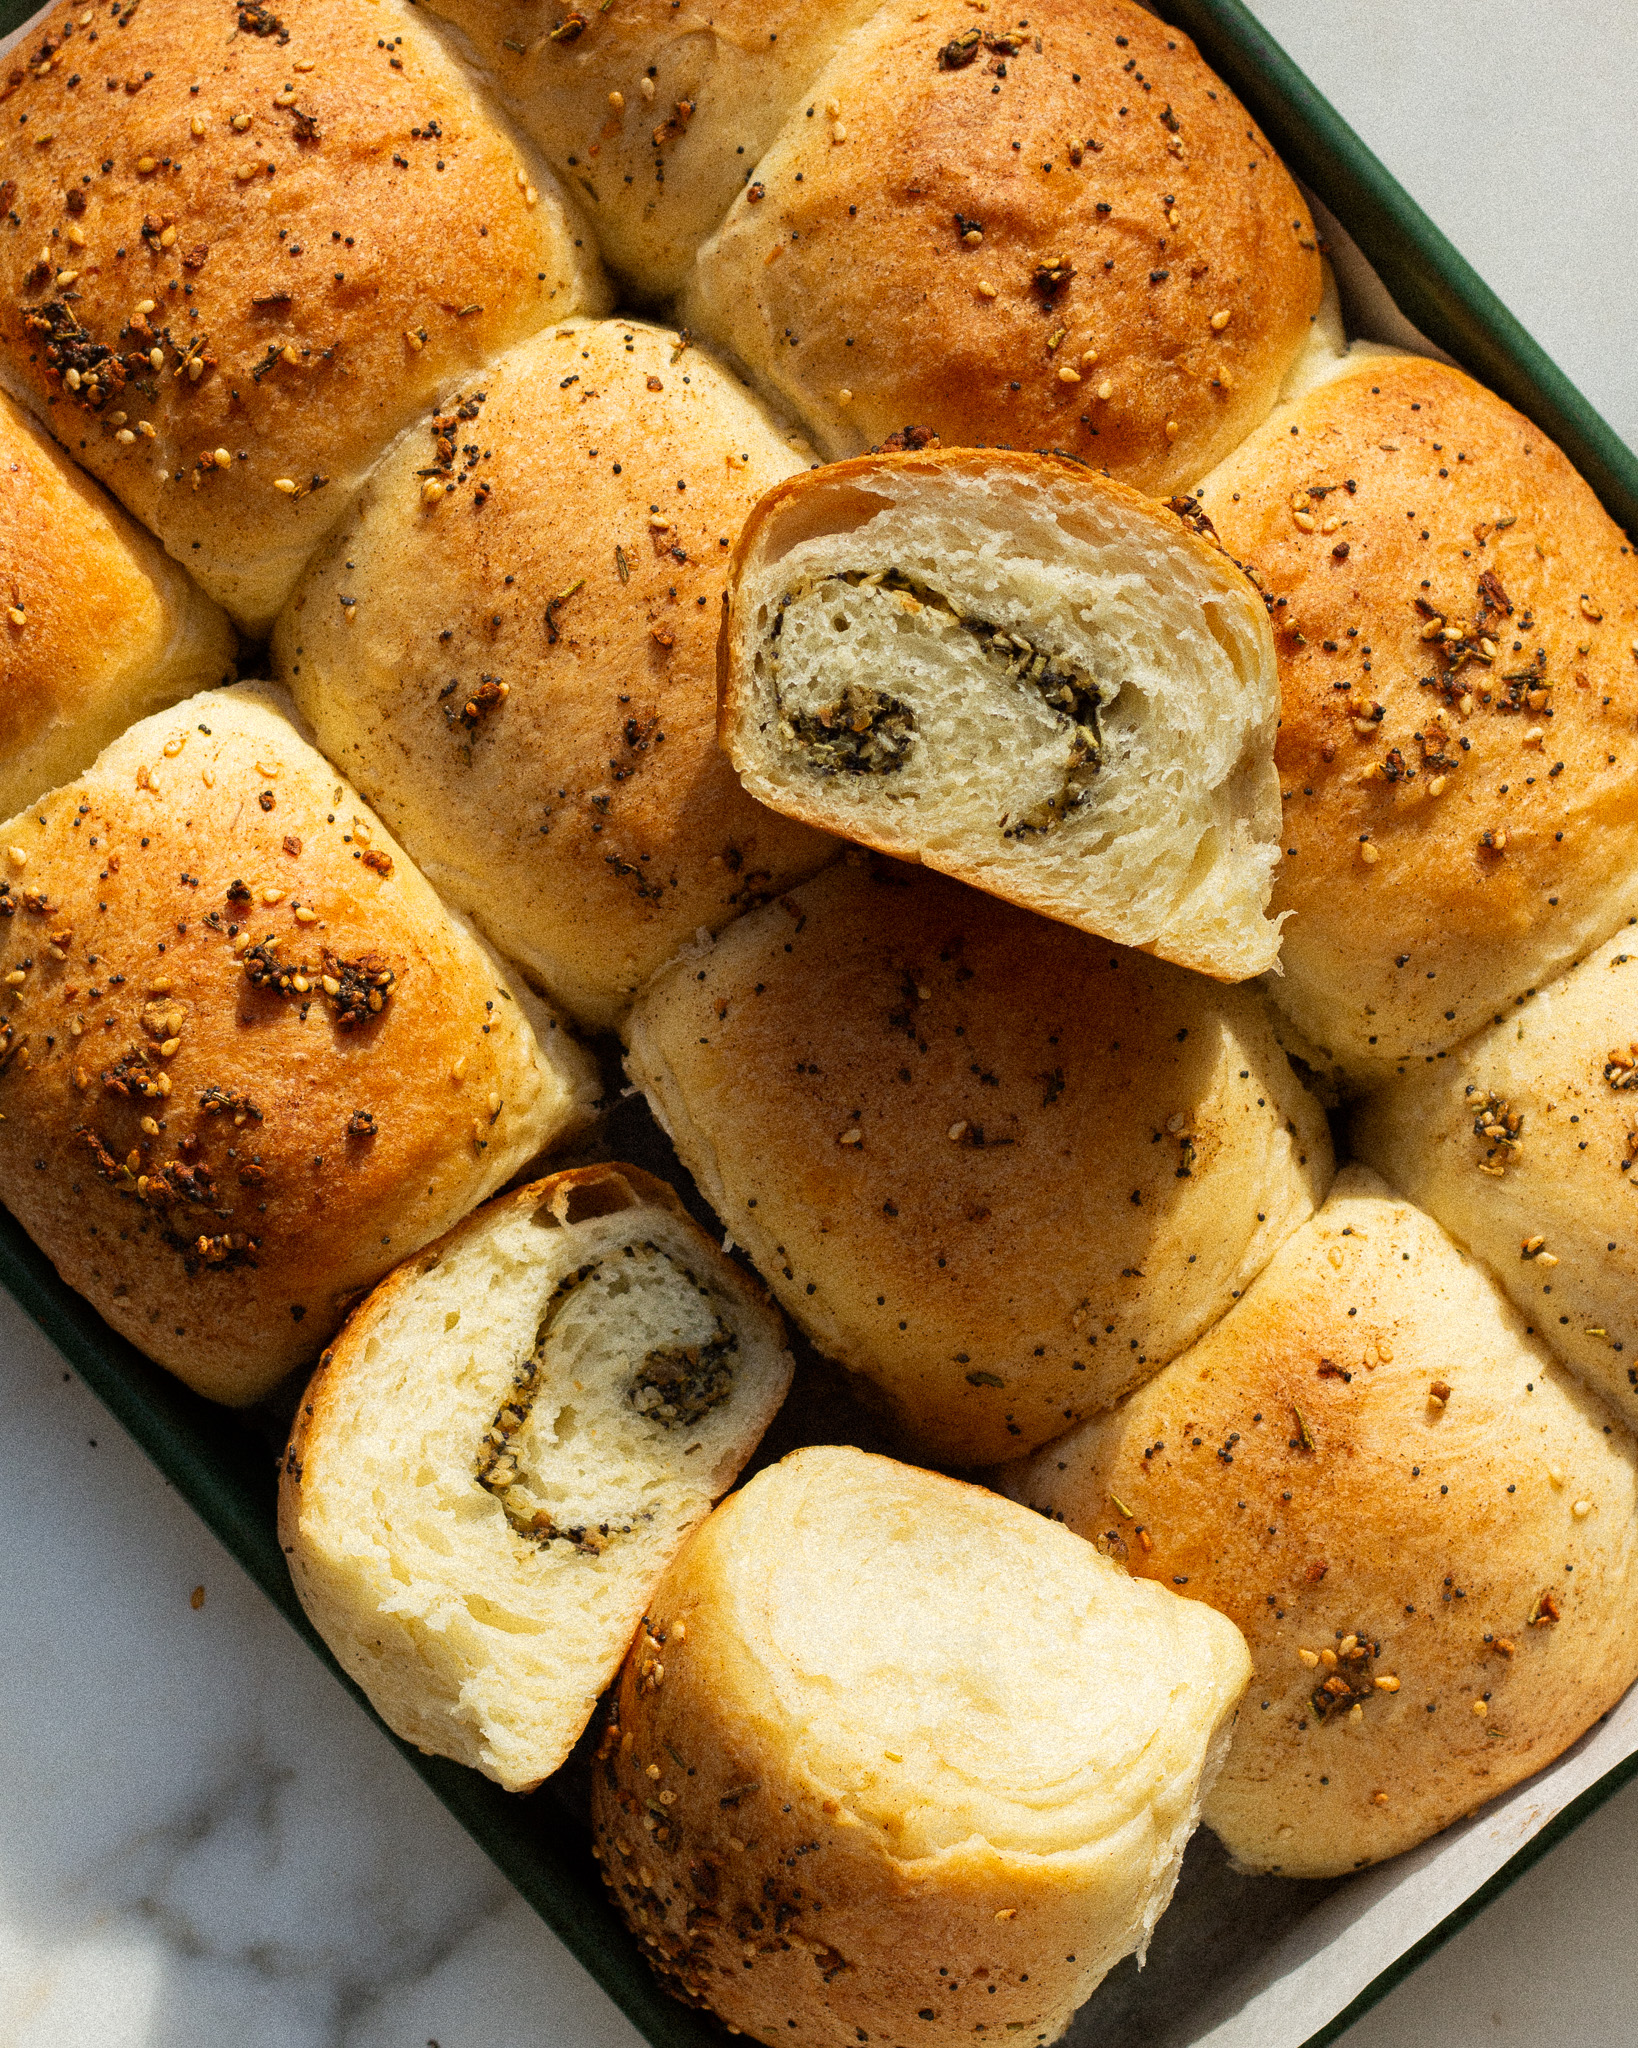
- 2 teaspoons rubbed sage
- 2 teaspoons dried rosemary
- 2 teaspoons dried thyme
- 6 tablespoons everything but the bagel seasoning, or 2 tablespoons each of garlic flakes, white sesame seeds and onion flakes, 2 teaspoons of poppy seeds and 2 teaspoons of flaky salt
- 1 large egg
For the bay leaf brown butter
- 2 dried bay leaves
- 2 tablespoons salted butter, 28 grams / 1 ounce
Instructions
- Whisk together the 234 grams of milk and 117 grams of water. Either on the stove or in the microwave, bring it up to 110°F-115°F.
- Whisk in 55 grams of sugar until it dissolves. Evenly sprinkle 7 grams of yeast over the top and whisk that in as well. Let this sit for five minutes or until foamy. Then whisk in the egg.
- In the bowl of a stand mixer, add 530 grams of flour and 12 grams of salt. Pour in the yeast mixture. Using the hook attachment, being to mix on medium speed.
- Add 57 grams of butter a few pieces at a time, allowing it to mix into the dough before adding the next pieces. Mix the dough for a total of 8-9 minutes, or until it begins to pull away from the sides of the bowl. Test the gluten by taking a golf ball-sized piece of dough and stretching it apart with your fingers. If it stretches thin enough that you can see light shine through it, but doesn't break, that means it's ready to rest.
- Cover the bowl with a lint-free towel. Leave in a dry, warm place to proof for one hour or until double in size.
- Once the dough has doubled in size, lightly flour your hands and gently punch out any excess air. Gently move the dough to a smooth surface. Flour it if you prefer, but I find the dough is strong enough that I do not need to.
- Using a scale, portion the dough into 12 equal pieces, 88 grams each.
- Stretch each piece into a rectangle that is four inches long.
- In a small bowl, whisk together all the ingredients for the seedy swirl.
- Scoop a heaping tablespoon of the seedy swirl mixture into the center of each roll and spread it into an even layer. There should be a small amount of the seed mixture left, just leave that in the bowl.
- Gently roll up each roll, then pinch in the sides and tuck them under the roll to hide the swirl. Place these on a 9 by 13-inch parchment-lined baking sheet.
- Cover and proof for another 45 minutes to an hour, or until 50% bigger in size.
- Set a rack to the center of the oven and preheat to 375°F.
- Set a small sauté pan over medium-low heat and add two bay leaves and 28 grams of butter. Let the butter melt, fizz and foam, allowing it to brown with the bay leaves, about 3-4 minutes. Pour the butter into the bowl with the remaining seed mixture and give it a mix.
- When the rolls are proofed, brush an even layer of the bay leaf butter on top of them, some seeds will come along, which we love!
- Bake the rolls for 20-25 minutes at 375°F, or until golden.
- Serve warm!
Notes
Note: You can do this recipe without a stand mixer. You will need to knead the dough by hand, adding a few pieces of butter at a time. Allow the butter to combine with the dough, and add flour to your kneading surface as needed.
Use the same gluten test listed in the instructions above to know when your dough is ready to proof!