
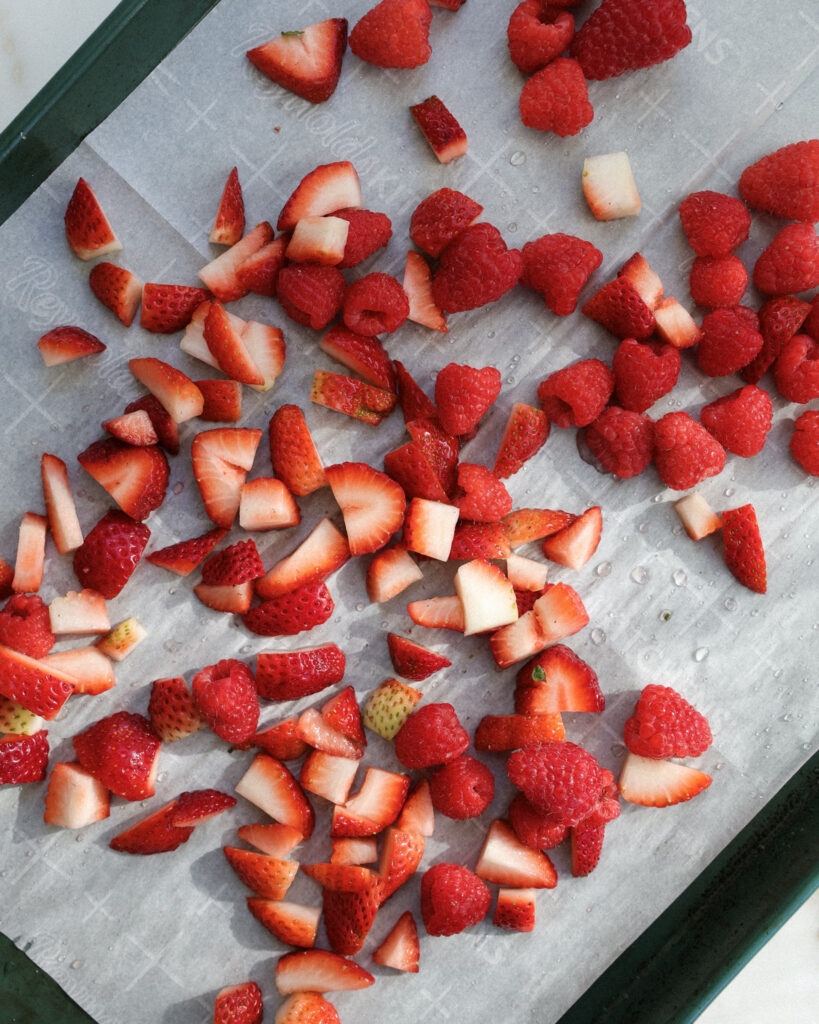
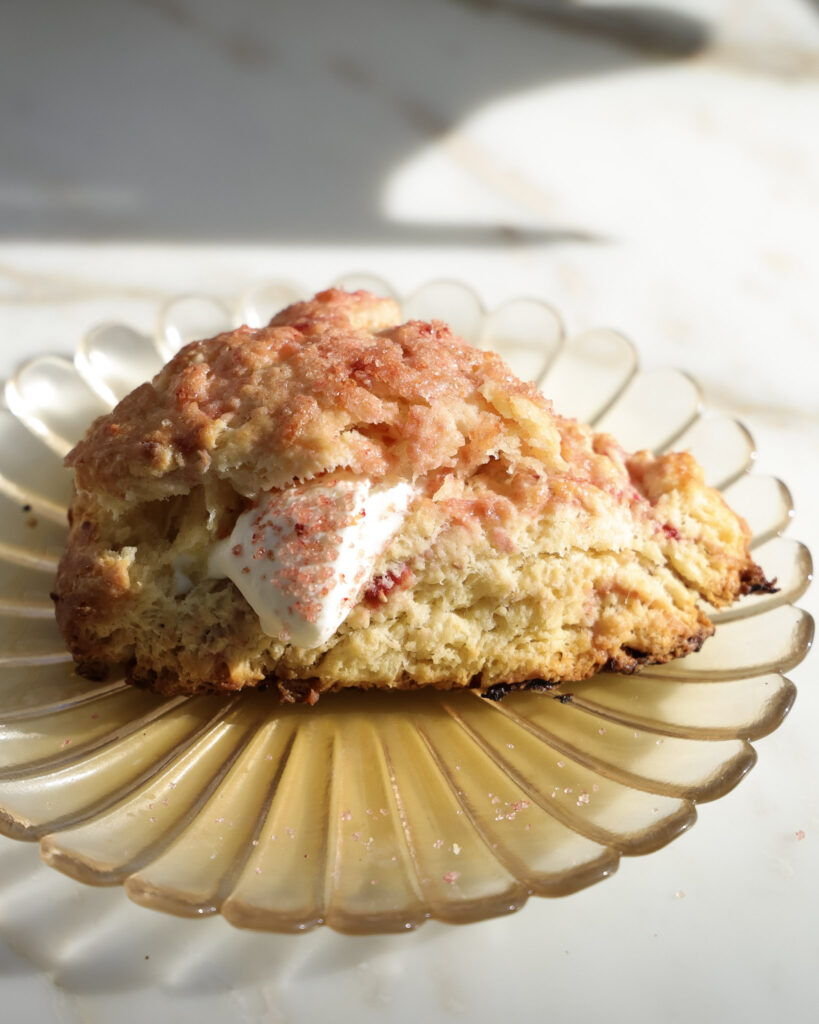
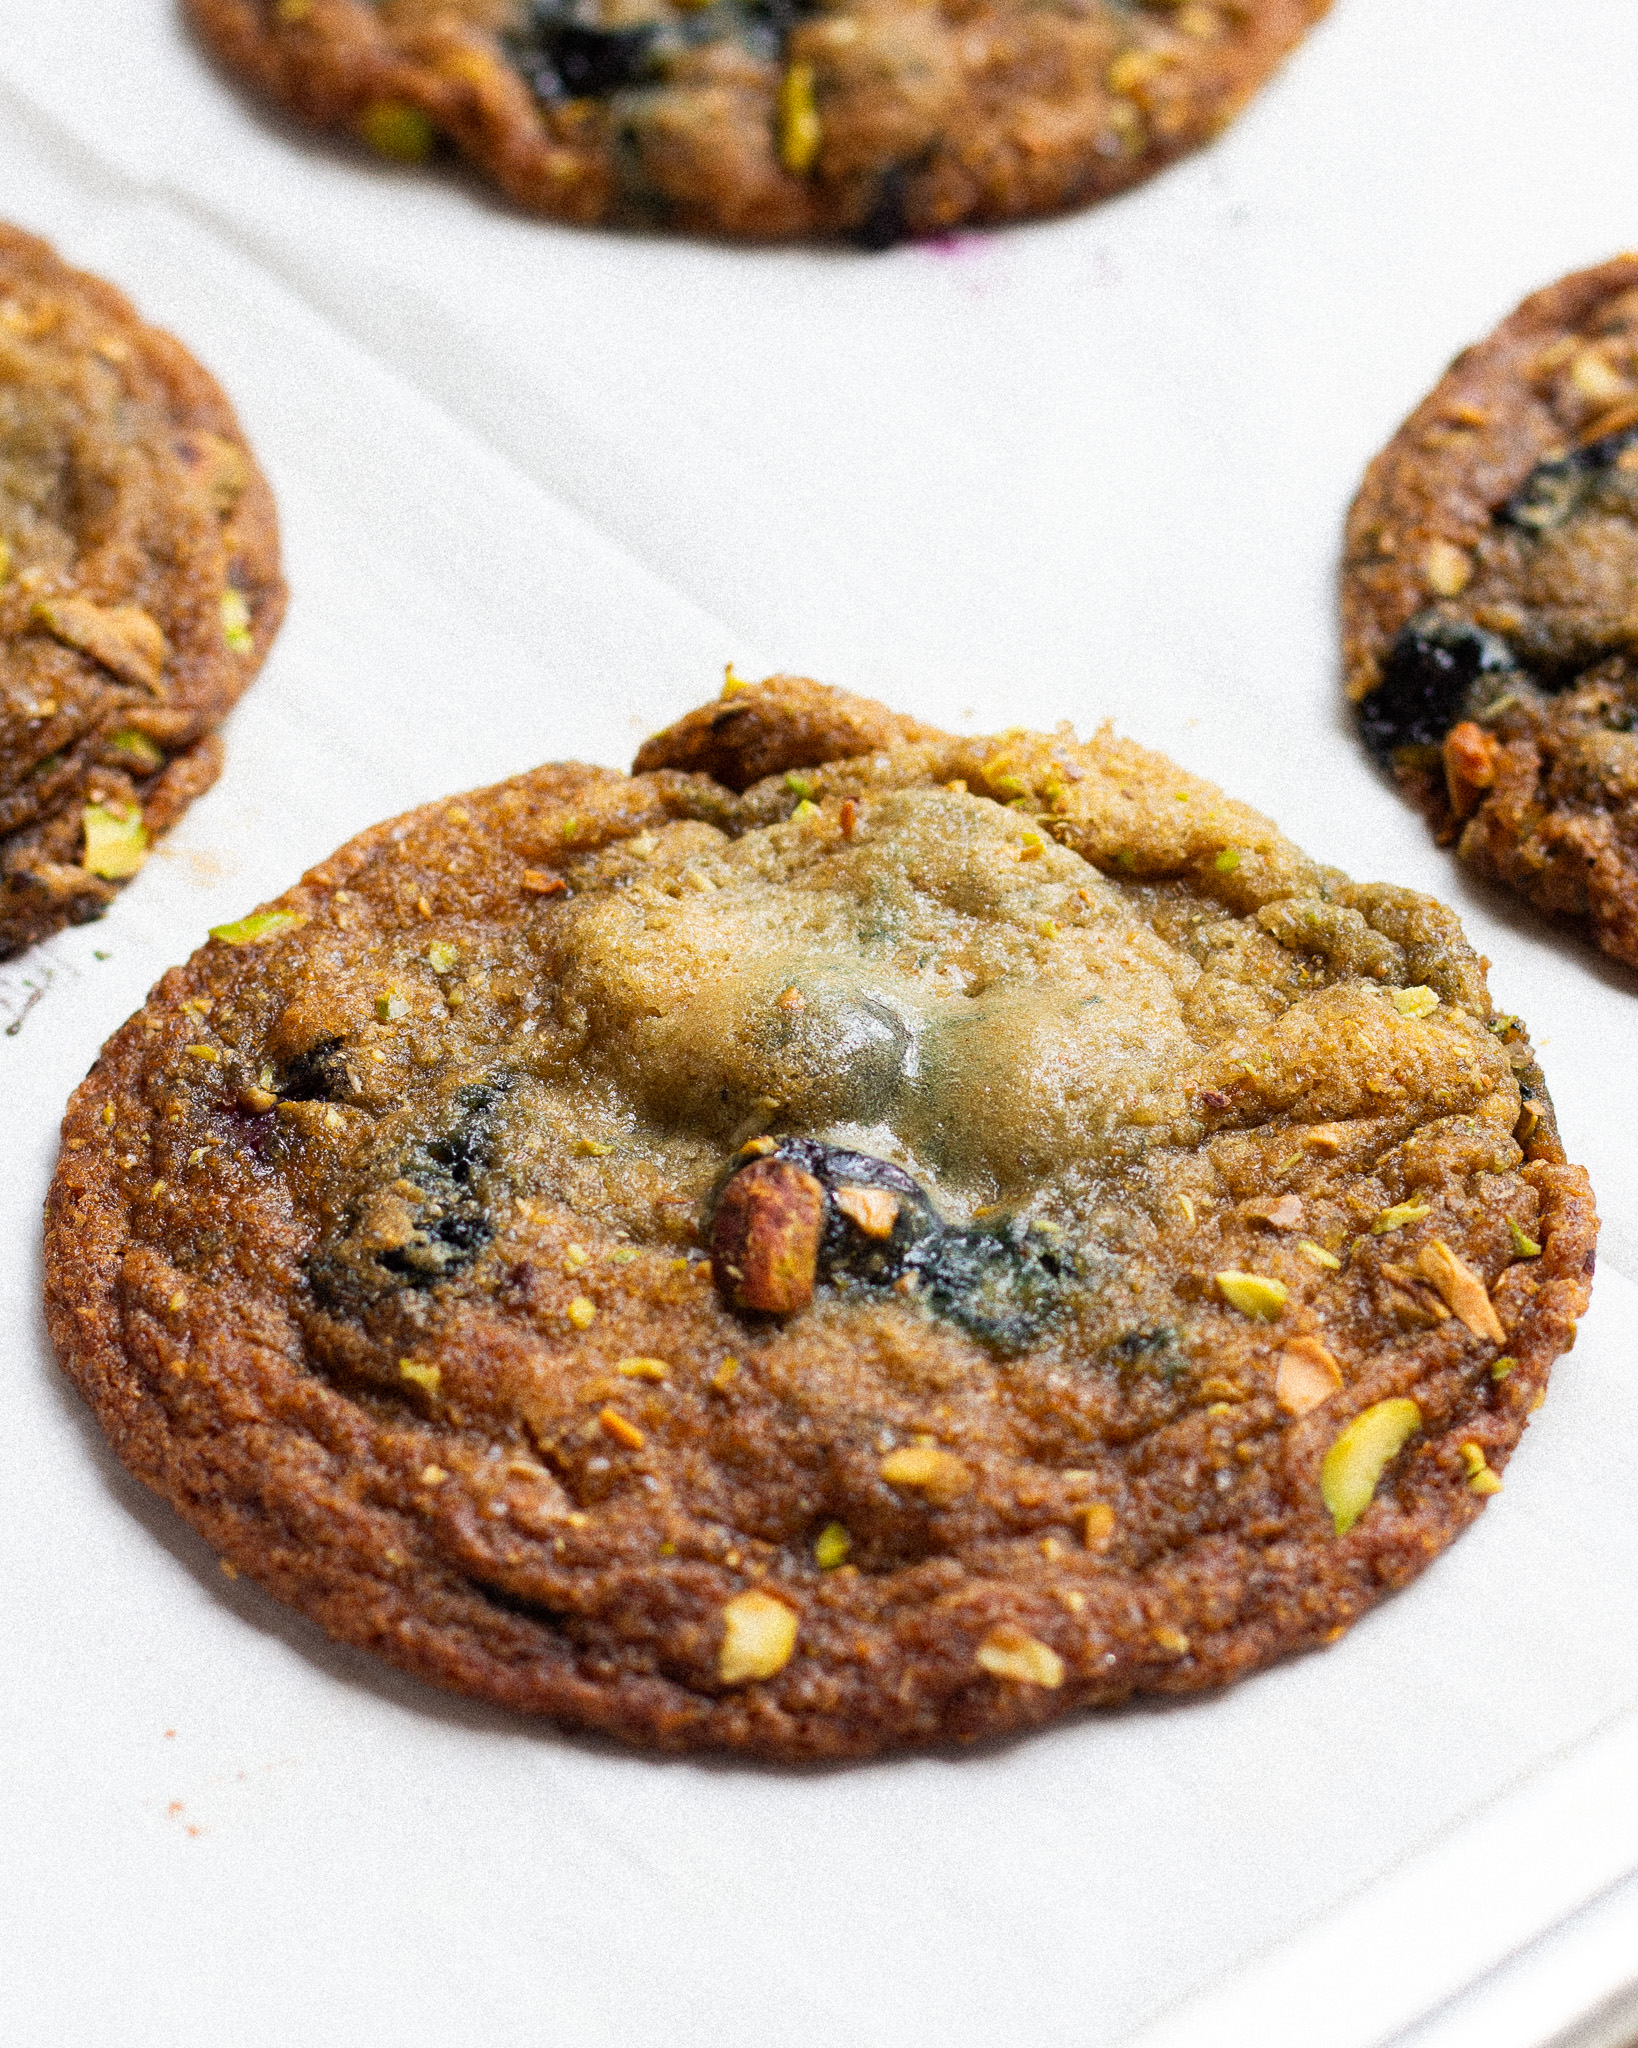
These strawberry and raspberry scones are exciting for so many reasons but the main one is that the berries are roasted and layered into the dough! Fresh berries tend to leak too much moisture, dried berries don’t give enough, but roasted berries land perfectly in the middle. They’re jammy, concentrated, and just moist enough to keep the scones tender without messing with that signature flaky texture. It’s the kind of small tweak that makes a big difference (and once you try it, there’s no going back).
What takes these scones up another level is the pink citrus sugar that’s sprinkled on top. It’s lightly lemony, naturally pink from beet powder, and it instantly makes these feel perfect for Valentine’s Day, Easter, Mother’s Day brunch or really any excuse you have to bake something pink.
You can use strawberries, raspberries, or a mix of both, as they’re totally interchangeable here, which keeps this recipe flexible!
Read on for the recipe, tips on how to make scones, as well as any substitutions that might help along the way.
Table of contents
Why are the berries roasted?
We roast the berries to get rid of some excess moisture and find that happy medium of not too wet, not too dry. Fresh berries can make scones tricky to shape and mess with that flaky texture, while dried berries don’t offer enough moisture. Roasting softens the berries, concentrates their flavor, and makes them melt beautifully into the dough. A little goes a long way, and honestly, that small change makes all the difference in every bite.
Ingredients you’ll need for roasted strawberry raspberry scones
- 1/2 cup (90g) strawberries, about 5 medium, quartered
- 1/2 cup (80g) raspberries
- 3 cups (420g) all-purpose flour
- 1/4 cup and 1 tablespoon (70g) granulated sugar
- 1 scant tablespoon Diamond Crystal kosher salt
- 1 scant tablespoon baking powder
- 1 cup (226g) salted butter, cold
- 1 1/4 cup (275g) buttermilk, chilled, plus extra for brushing
- 3 tablespoons turbinado sugar
- 2 teaspoons lemon zest
- 1/8 teaspoon beet powder
Ingredient substitutions
- Strawberries: can be swapped with more raspberries, or other berries like blackberries or blueberries (cherries also work!)
- Raspberries: can be swapped with more strawberries, or other berries like blackberries or blueberries (cherries also work!)
- All-purpose flour: can be swapped for King Arthur’s 1:1 Gluten-Free Baking Flour.
- Buttermilk: if you don’t have it, just add 1 tablespoon + 3/4 teaspoon of an acid, either white vinegar or lemon juice, to a measuring cup. Fill the measuring cup to the 1 1/4 cup mark with regular milk. Stir and let the mixture rest for a few minutes then you’re good to go!
- Beet powder: Instead of beet powder, you can blend up freeze-dried berries until you have a fine powder.

Tips for how to mix perfectly flaky scone dough
Getting flaky scones is all about the dough, so here are my top tips to help you get them just right every single time:
- Don’t overwork the dough: Move it from the bowl to your counter or work surface, even if it’s still a little shaggy and unmixed. It’ll be easier to handle and shape the dough.
- Use flour: as needed to help tuck the butter back into the dough. This helps prevent the butter from melting too early and results in those perfectly flaky scones.
- Layer, layer, layer! Cutting the dough in half, layering it on top of itself and pressing down repeatedly will create more and more layers.

How to mix berries into a scone dough
- Shape the dough: Once you’ve moved your dough to your work surface, gather any shaggy bits and form the dough into a large disc. Cut it in half and layer the halves on top of each other. Push down, dust with a little flour, and rotate 90°. Pat it into a rectangle, cut in half again, and repeat.
- Add the berries: Pat the dough down into a 2-inch high rectangle. Sprinkle the roasted berries on top, then cut the dough in half and stack the pieces on top of each other. Press down (it’s going to get a little messy!) then rotate and cut down the center again.
- Lock in the berries: Cut the dough in half one more time but this time flip the top piece over so the dough is now on the outside, enclosing all the berry layers inside.
If any butter pockets pop out from the dough, be sure to add flour to “seal” them back in.

Serving Suggestions
These scones are perfect on their own, but they really shine with a little extra something:
- Whipped cream, clotted cream, or jam – just be sure to save some extra pink sugar to sprinkle on top!
- A cup of coffee or tea
- Fresh berries on the side (of course)

Why is this recipe in grams?
Grams is always my preference for baking, and I hope it will be yours, too. The only way to ensure complete accuracy is through measuring by weight, not volume. One cup of flour can weigh all the way from 120 grams to 160 grams, depending on how it was packed. This ends up causing some volatility and miss-matched results.
I want to ensure you get the best results with this recipe (and I want to keep this recipe fool-proof!) so I highly recommend getting a small affordable kitchen scale if you want to move forward with this particular recipe.
Watch the recipe here:
The video may not fully represent the recipe. For best results, follow the instructions as written.
Looking for similar recipes?

Sugared Fig Scones

Strawberry Shortcake
Raspberry Muffins with Basil Syrup
And that’s everything for these Roasted Strawberry and Raspberry Scones!
If you make it, please tag me on Pinterest or Instagram so I can see! It’s my favorite thing to scroll through stories and see what you all are making.
You can also shop this video if you’re looking for the exact pieces I use – I’ve linked everything on my ShopMy! *some links may contain affiliate commissions
And of course feel free to leave any questions, comments or reviews! This is the best place to reach me, and I’d love to hear from you <3

Equipment
Ingredients
For the scones:
- 1/2 (90g) cup strawberries, about 5 medium, quartered
- 1/2 (80g) cup raspberries
- 3 (420g) cups all-purpose flour
- 1/4 (70g) cup and 1 tablespoon granulated sugar
- 1 scant tablespoon Diamond Crystal kosher salt
- 1 scant tablespoon baking powder
- 1 (226g) cup salted butter, cold
- 1 1/4 (275g) cup buttermilk, chilled, plus extra for brushing
For the pink citrus sugar:
- 3 tablespoons turbinado sugar
- 2 teaspoons lemon zest
- 1/8 teaspoon beet powder
Instructions
- Position a rack to the center of the oven and preheat to 375°F convection (or 400°F standard).
- Wash and add 1/2 cup strawberries and 1/2 cup raspberries to a sheet pan. Bake for 25-30 minutes, or until they are jammy and reduced in moisture by half.
- In a large bowl, whisk together the 420 grams flour, 70 grams sugar, and 1 scant tablespoon of salt and baking powder.
- Use the larger holes of a box grater to grate in 1 cup butter into big shreds.
- Working quickly, toss the butter in with the flour to get every piece coated. Use your fingers to press the butter into flattened, pea-sized pieces.
- Drizzle in 275 grams of buttermilk. Gently mix it into the dough with your hands. A shaggy dough will quickly form. It will feel flaky, but that’s a good thing.
- Even if it’s not perfectly mixed, move it to a work surface. From here, shape it into a large disc, collecting any shaggy bits. Cut this in half and layer the halves on top of each other. Push down, dust with flour, and rotate 90°. Pat it down into a rectangle, cut in half, and repeat. Add flour as needed to “seal” up any butter pockets.
- Pat the dough down into a 2-inch high rectangle, then take the roasted berries and layer them on top. Cut the dough in half and layer the pieces on top of each other. Press down (it will be messy!) then rotate and cut the dough down the center again.
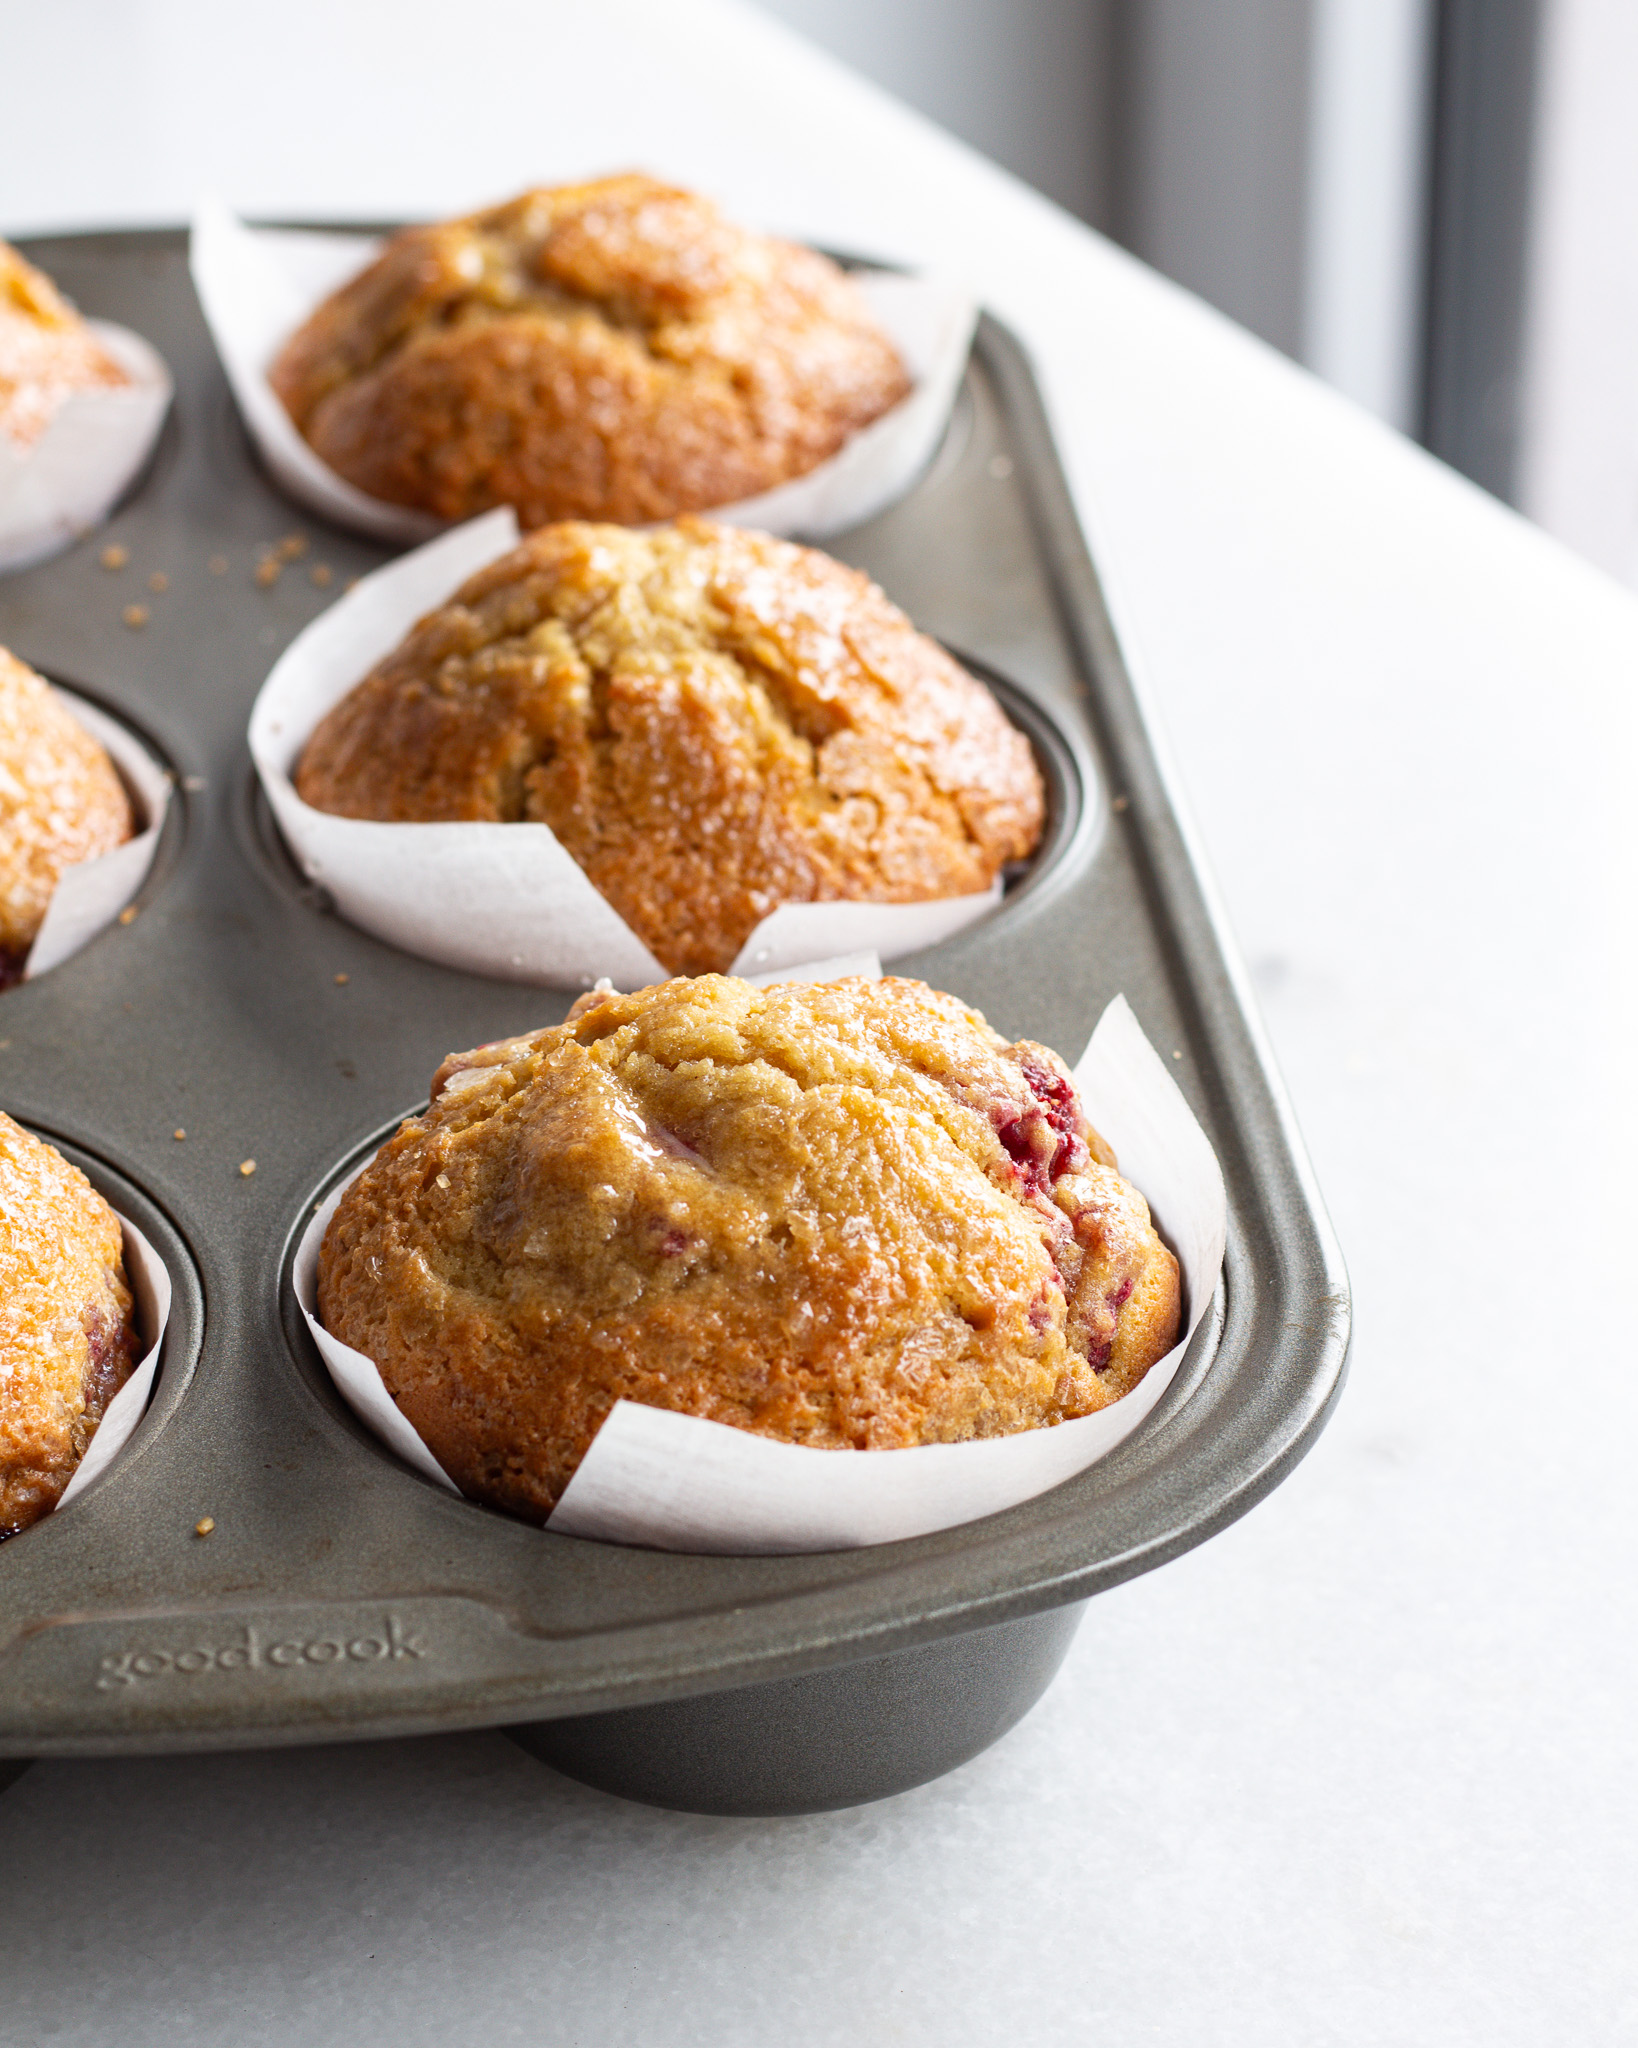
- This time flip the dough on top so that the dough is on the outside, and all berry layers are now inside the dough. Dust liberally with flour and press this into a 1 1/2 inch tall disc. Place this on a parchment-lined baking sheet and move it to the fridge to chill for 5-10 minutes.
- While the dough is chilling, mix together the turbinado sugar, lemon zest and beet powder. Scrunch this with your fingers to make a pink sugar, set aside.
- Cut the dough into 8 triangle scones. Spread them out on the baking sheet (they will puff up a lot so give them some room!).
- Brush with more buttermilk and sprinkle each with pink sugar.
- Bake at 375°F convection (or 400°F standard) for 25-30 minutes or until deeply golden on top. Eat warm!

Comments
Could the dough be made the night before or would that be too long in the fridge?
Absolutely! Shape the dough into a circle, wrap and seal with cling wrap and then refrigerate for up to 24 hours in the fridge. When you’re ready, cut and bake! I hope you love them <3
I always freeze my scone dough and bake from frozen. I just add a little extra time.
If I want to prep these the night before, at what stage should I refrigerate the dough? Thanks!!!
Great question, you absolutely can! Shape the dough into a circle, wrap and seal with cling wrap and then refrigerate for up to 24 hours in the fridge. When you’re ready, cut and bake! I hope you love them 🙂
Thank you so much for making your recipes easy to find on your site and also that we can pin them to save them for the future. This helps me tremendously. Not to mention these scones look amazing and I love scones and I am planning to make these also for myself tomorrow if I can get to the store to get some strawberries and raspberries!!
This is sooo great (and such a relief) to hear, I’m so glad you love the site! Please let me know if you end up making the scones and how you like them <3
I am definitely making these this weekend! Can I cut them into hearts? I have a large heart cookie cutter that I think might work.
How fun, absolutely! Depending on the size of the cookie cutter, just keep an eye on them in the oven in case they bake more quickly or need an extra minute or two. Let me know how they turn out <3
These were amazing!!! Made them tonight for Valentine’s day. Didn’t have beet powder so used freeze-dried raspberries and they tasted delicious. When roasting the fruit for 25 minutes at 400 they got really black on the bottoms but I scraped off the burn and it tasted great, but next time I might try roasting for less time. (Also I think the macros on the recipe are off, it’s saying just 1g fat!)
I’m happy you liked it, and the fruit can get dried out quickly so putting them on the top rack will also help!
Could these be frozen? Either before or after baking? Thanks!
After is better for freezing! I freeze mine and they reheat like a dream 🙂
Any tips for reheating?
Yes! I’d recommend baking them for 5 to 10 minutes in a preheated 350°F oven and either wrap them completely or tent them with aluminum foil to prevent them from browning or drying out. You could also briefly microwave them in 15-second bursts until they are warm and soft.
LOVED THESE, although they got a bit burnt on the bottom, I think my oven runs a bit hotter so next time I’ll pull them out earlier but definitely a recipe we will be making again.
So glad you liked it! And my oven is gas so it tends to bake differently than electric, if you have an electric oven that might explain the difference!
The dough turned out really wet, so next time I will cut the buttermilk back just a tad or swap a bit of it for Greek yogurt. Also, the chill time was not long enough, so I did have some butter leakage. It felt really short as written, but I was on a time crunch so I was willing to give it a go, alas. I will make sure to up the chill time on the second go around.
Hi M! I’m so sorry this didn’t work out for you! Was your brand of buttermilk particularly thin? This recipe uses 25mL less than my standard scone, so I’m sorry that it came out wet on your end, I assure you it was not designed to be that way! Another reason why your dough may have been too sticky is because the butter got too warm during mixing. It’s always hard to nail down the factor, but I apologize that you had issues! As for the chill, I’ve found many have had good results with that chill time, but again they were probably working under different dough conditions, so it’s truly your call! I hope you’ll give it another go, and I am so sorry again for any issues you had.
Truly so delicious. I’m making my second batch this week currently. So many options for variation with different fruits. They turn out so flaky and fluffy but crispy on the edges. Thank you for this one!
I’m so glad you liked them!! Thanks so much for taking the time to leave a review!
Saving this for life! Much cleaner process thanks to “drying” out the berries. Love the height got on these!
So so thrilled you liked them!!
Leave a Comment
Made this recipe? Tell me all your thoughts or if you’ve got any questions!