I am on a mission to show that a buttery, flaky, melt-in-your mouth, tender biscuit is NOT difficult to make. It’s actually super easy. And this single-serving vegan “buttermilk” biscuit proves it!
Not gonna lie, when I first set out to make this recipe I did not think it could be done. That’s because of the science behind a classic biscuit recipe, which I’ll go into a bit more detail on in the paragraphs below. So unfortunately, I let my preconceived judgements about vegan butters scare me off from trying this recipe for weeks! But when I finally did it, it turned out fluffy, soft, amazing and ready in under half an hour?! I was shook.
This single-serving biscuit is perfect for when that craving hits, but you don’t want to make a whole lil family of them. You can whip this up for a weekend breakfast, a quick brunch or as a lazy Saturday biscuits and gravy!
The best part is I call this recipe my “lil biscuit.” But it’s actually huge. So huge that you can split it into two biscuits if you want. We got options!

It’s so easy to be intimidated by any baking recipe that requires some precision and working on a floured surface. BUT DON’T PANIC. Fear leads to baking mistakes and baking mistakes lead to sad single-servings.
What we really need to do here is know that you have two important factors you need to pay attention to: temperature and time.
It might take a bit of trial and error to really get the feel for biscuit making, but practice makes perfect, and these ingredients are designed not to overwhelm you if you are a beginner baker, but still make sense if you are an expert.
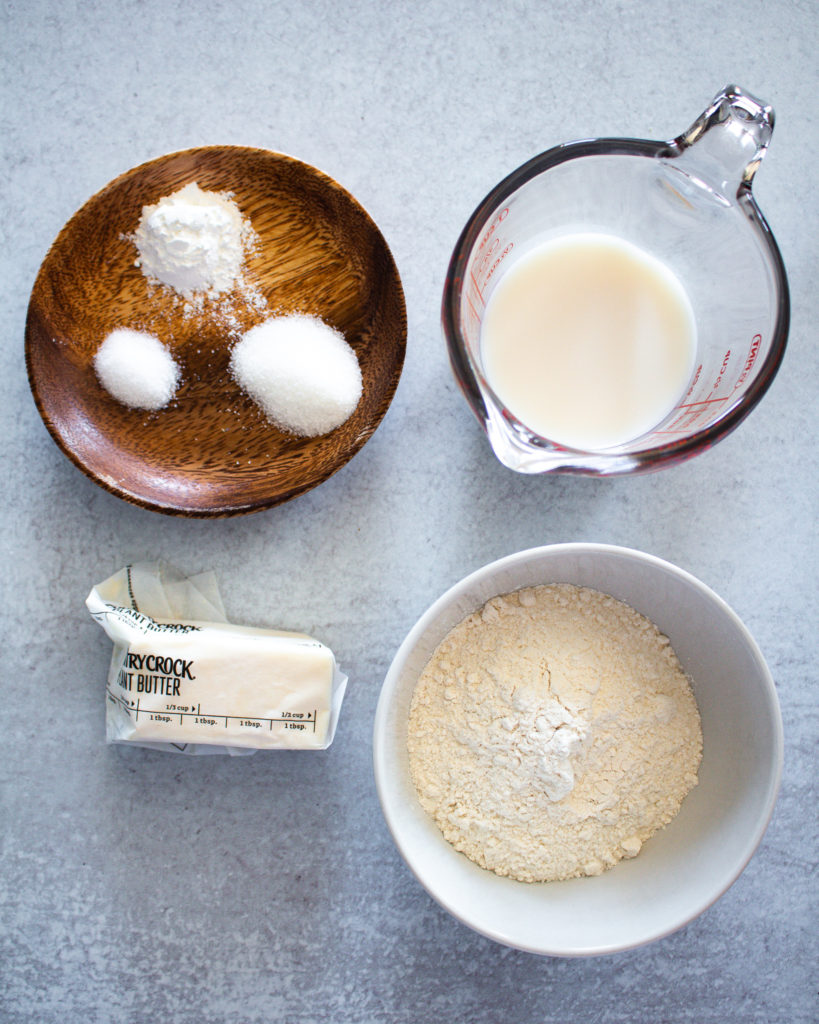
You only need this for the recipe:
- 70 grams all-purpose flour about 1/2 cup, plus more for dusting
- 1/4 tbsp baking powder
- 1/4 tbsp granulated sugar
- 1/4 tsp salt
- 2 tbsp FROZEN unsalted vegan butter (I used Country Crock Plant-based)
- 3 tbsp ICE COLD almond milk or oat milk
And after that it’s all about technique!
Now let’s talk about why temperature and time are so important.
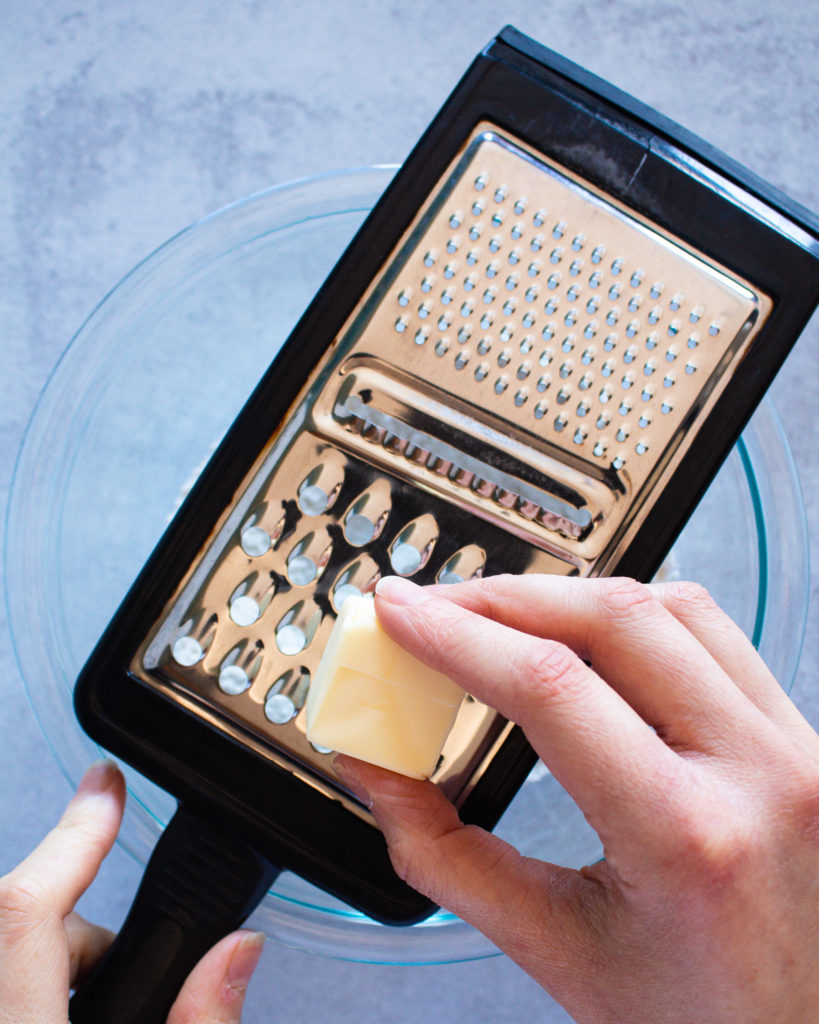
First things first – temperature. You’ll see in the ingredients that I asked that your butter be frozen and your milk cold. That is because we want this biscuit to be as chilled as possible while we are working with the dough. We do not want the butter to soften or melt.
In many ways this is what makes a biscuit very similar to a pie dough. In both kinds of recipes, you are looking for flakey layers, which is caused by chunks of butter between flour melting during the cooking process, creating steam which expands the biscuit and creates discernible, delicious layers.
If you let the butter get too warm, you won’t be able to keep it’s form between the flour, and those layers will be lost, creating a dense, dry and not-so-nice biscuit texture.
And that is also why we keep the milk ice cold. We want it to help the dough come together, but we don’t want it messing with the butter’s temperature.
Now let’s talk about why time is so important. Time matters most when it comes to mixing together your dough. You want to mix it as little as possible to avoid developing gluten in the flour. This will also help keep the temperature of the butter low, which if you read my rant above, you know how important that is 😉
But you also what to quickly pull the dough together, shape it and set it up because the less you “mess” with the biscuit dough, the better it will be. Try not to use more flour than you need to or more kneading than you need to. Just do a quick mix-and-go for this dough and you won’t regret it, I promise 😉
Once our cold butter is in with the flour mix, it is time to get to WORK babayyy.
What I chose to do to create as many flakey layers is to create a “tri-fold” method. Think: a book fold but with less intense measurements.
But before we get to shaping we have to fully form the dough. You want to do this by:
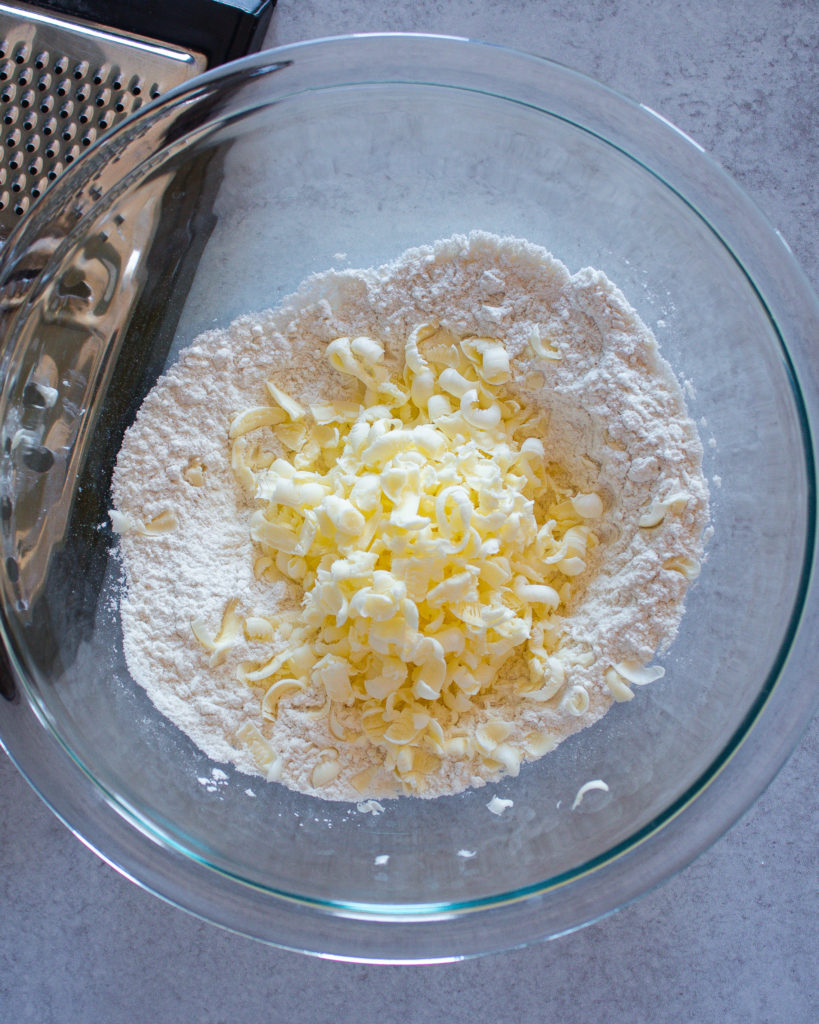
- Immediately tossing the butter pieces in with the flour to coat them all (this will make mixing the dough SO much easier, you are kind of creating a little flour barrier).
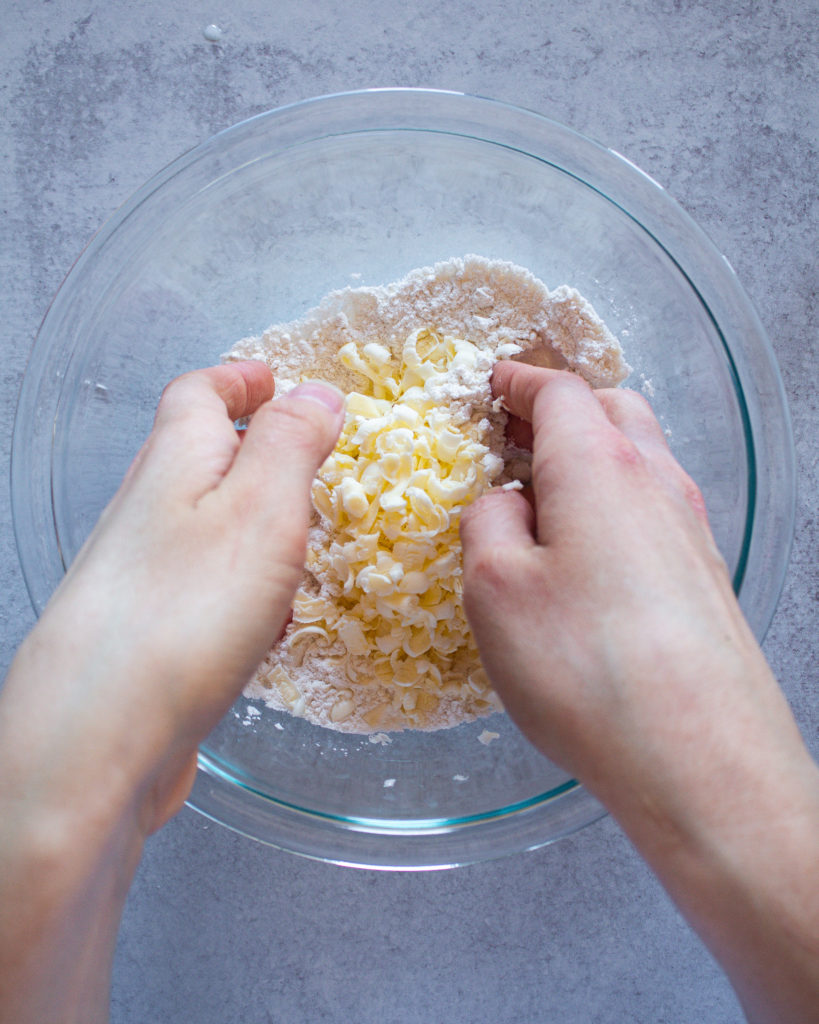
- Working the butter sligggghtly with your hands until no piece is bigger than a lentil
- Gradually adding in the milk, whisking constantly with a fork.
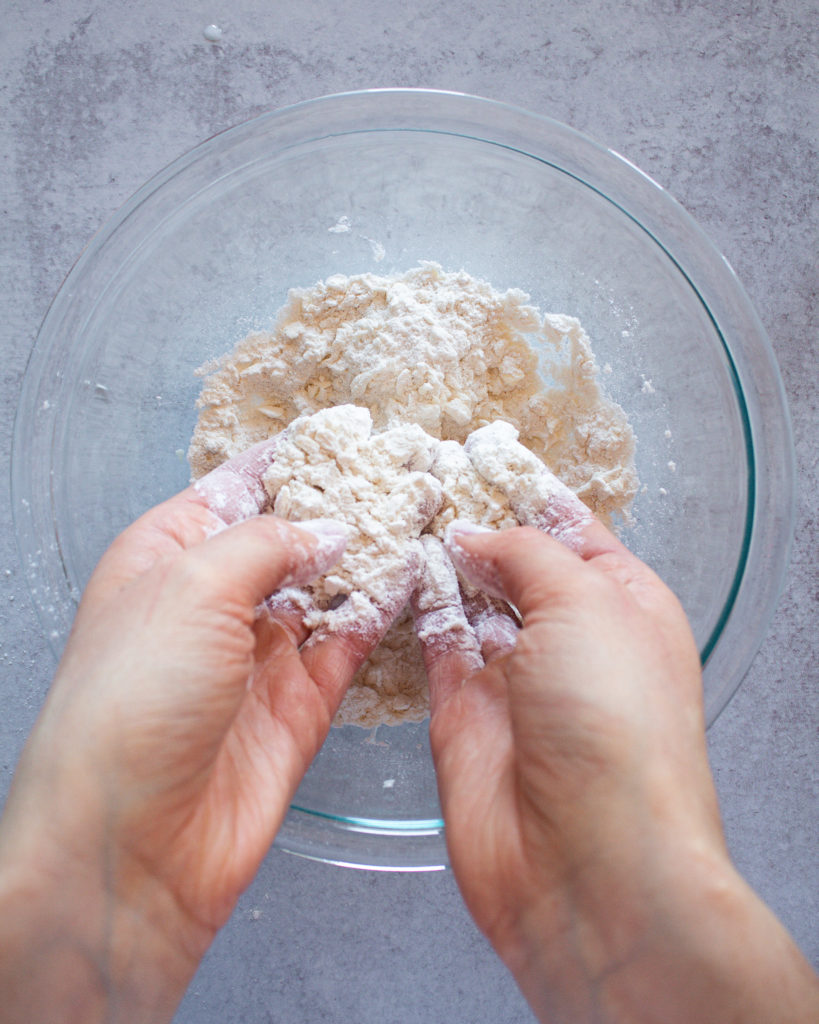
We use a fork when mixing in the milk because that helps keep the temperature low. You’ll eventually need to switch to your hands to help the dough come together, but that’s at the very end! You only want to use your hands when you see that the fork will no longer get the job done.

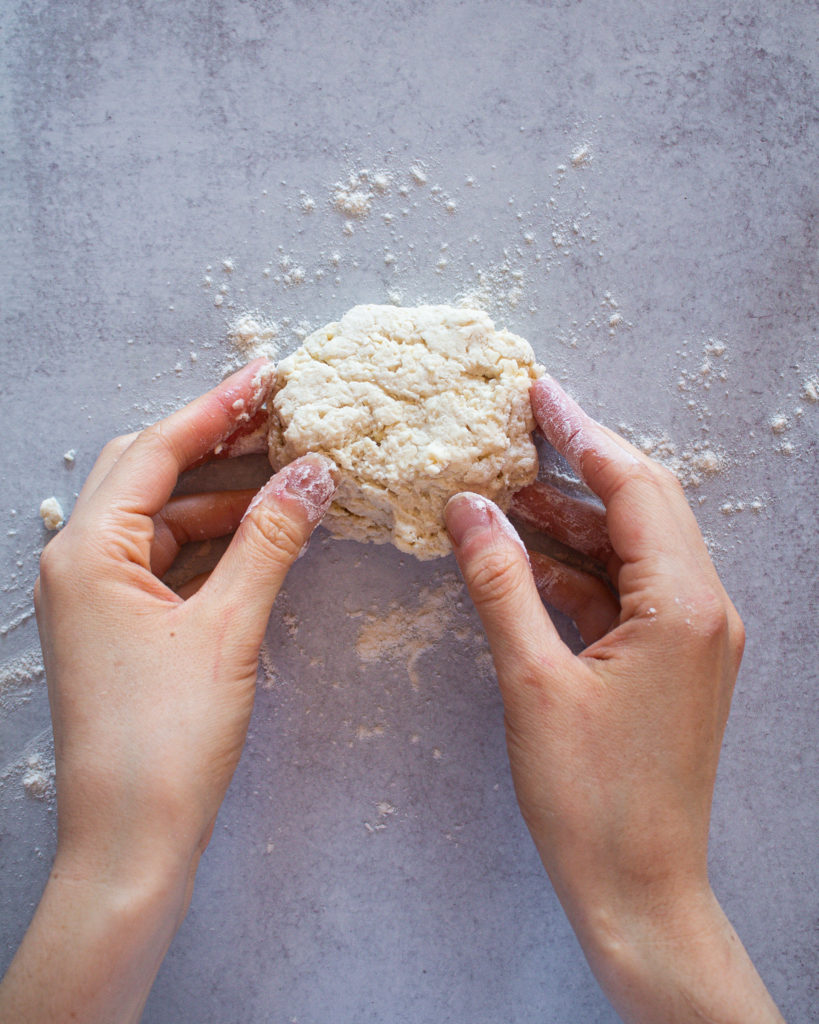
Once the dough is formed, it will feel suuuuper tender and delicate. And that’s ok! We can treat her like the lil dough princess she is.
Carefully place her on a lightly floured surface and get ready to fold.
Remember – when doing this folding process we want to use as little flour as possible. The more flour, the less tender and buttery your biscuit will be!
And we have made it to the TRI FOLD stage! This is actually super easy. We just want to fold the dough into three layers. Rotate, and do it again.
Think of it this way:
- Gently press the dough into a rectangle.
- Fold the right 1/3 of the dough into the center.
- Fold the left 1/3 of the dough on top of it.
- Press down gently until you form another rectangle.
- Rotate 90 degrees and repeat.
I put visuals below to hopefully help with this!
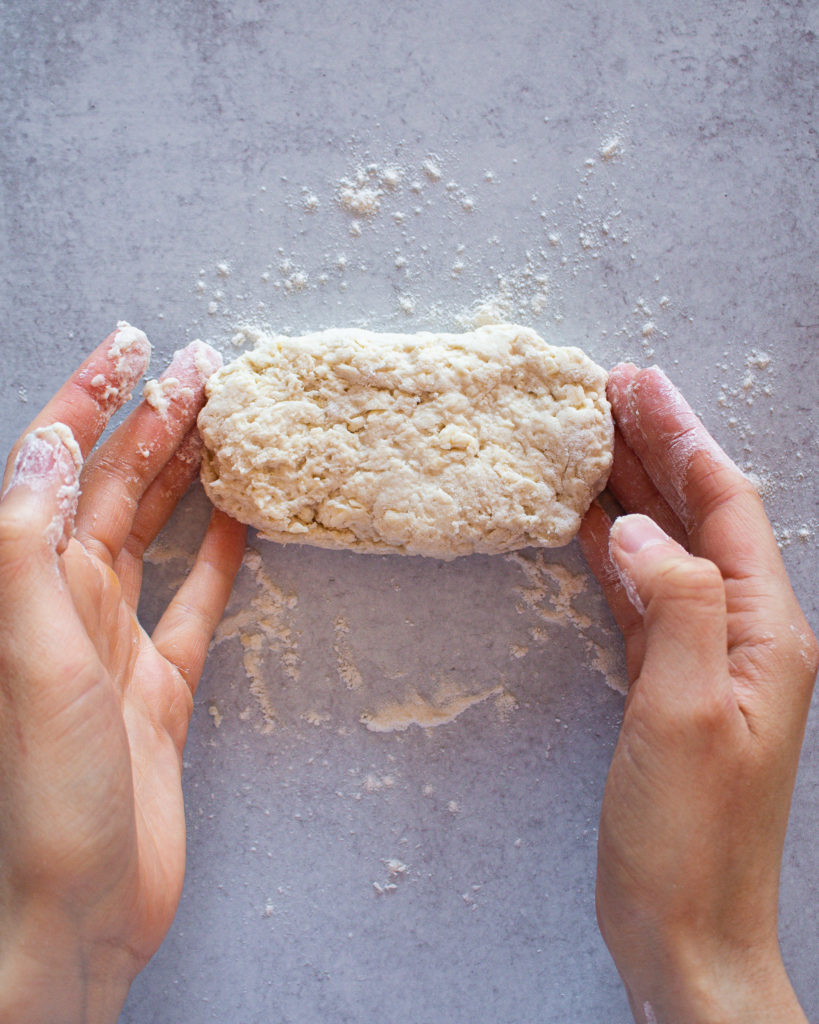


See in the image above how the tri fold is done? In the image on the left, you are doing the first fold, and then in the image on the right you are doing the second.
What is happening is we are creating even more layers of butter in the biscuit. The more layers, the better the biscuit, so feel free to do this up to 3 times!


Now what happens if you feel a butter pocked break through? Don’t stress, I gotchu.
Ideally, we want all the butter to stay nicely covered and laminated by the flour. But when working a dough, that’s not always the case. In rare cases where some butter comes through (you’ll be able to feel it) do this quick hack:
- take a bit of flour on your fingertip and pat it over the butter section to “seal” it.
This is similar to what happens when trying to fix some butter breakage in puff pastry, just in biscuit form! But again, try not to over do it on the flour, just use it for emergency cases only.

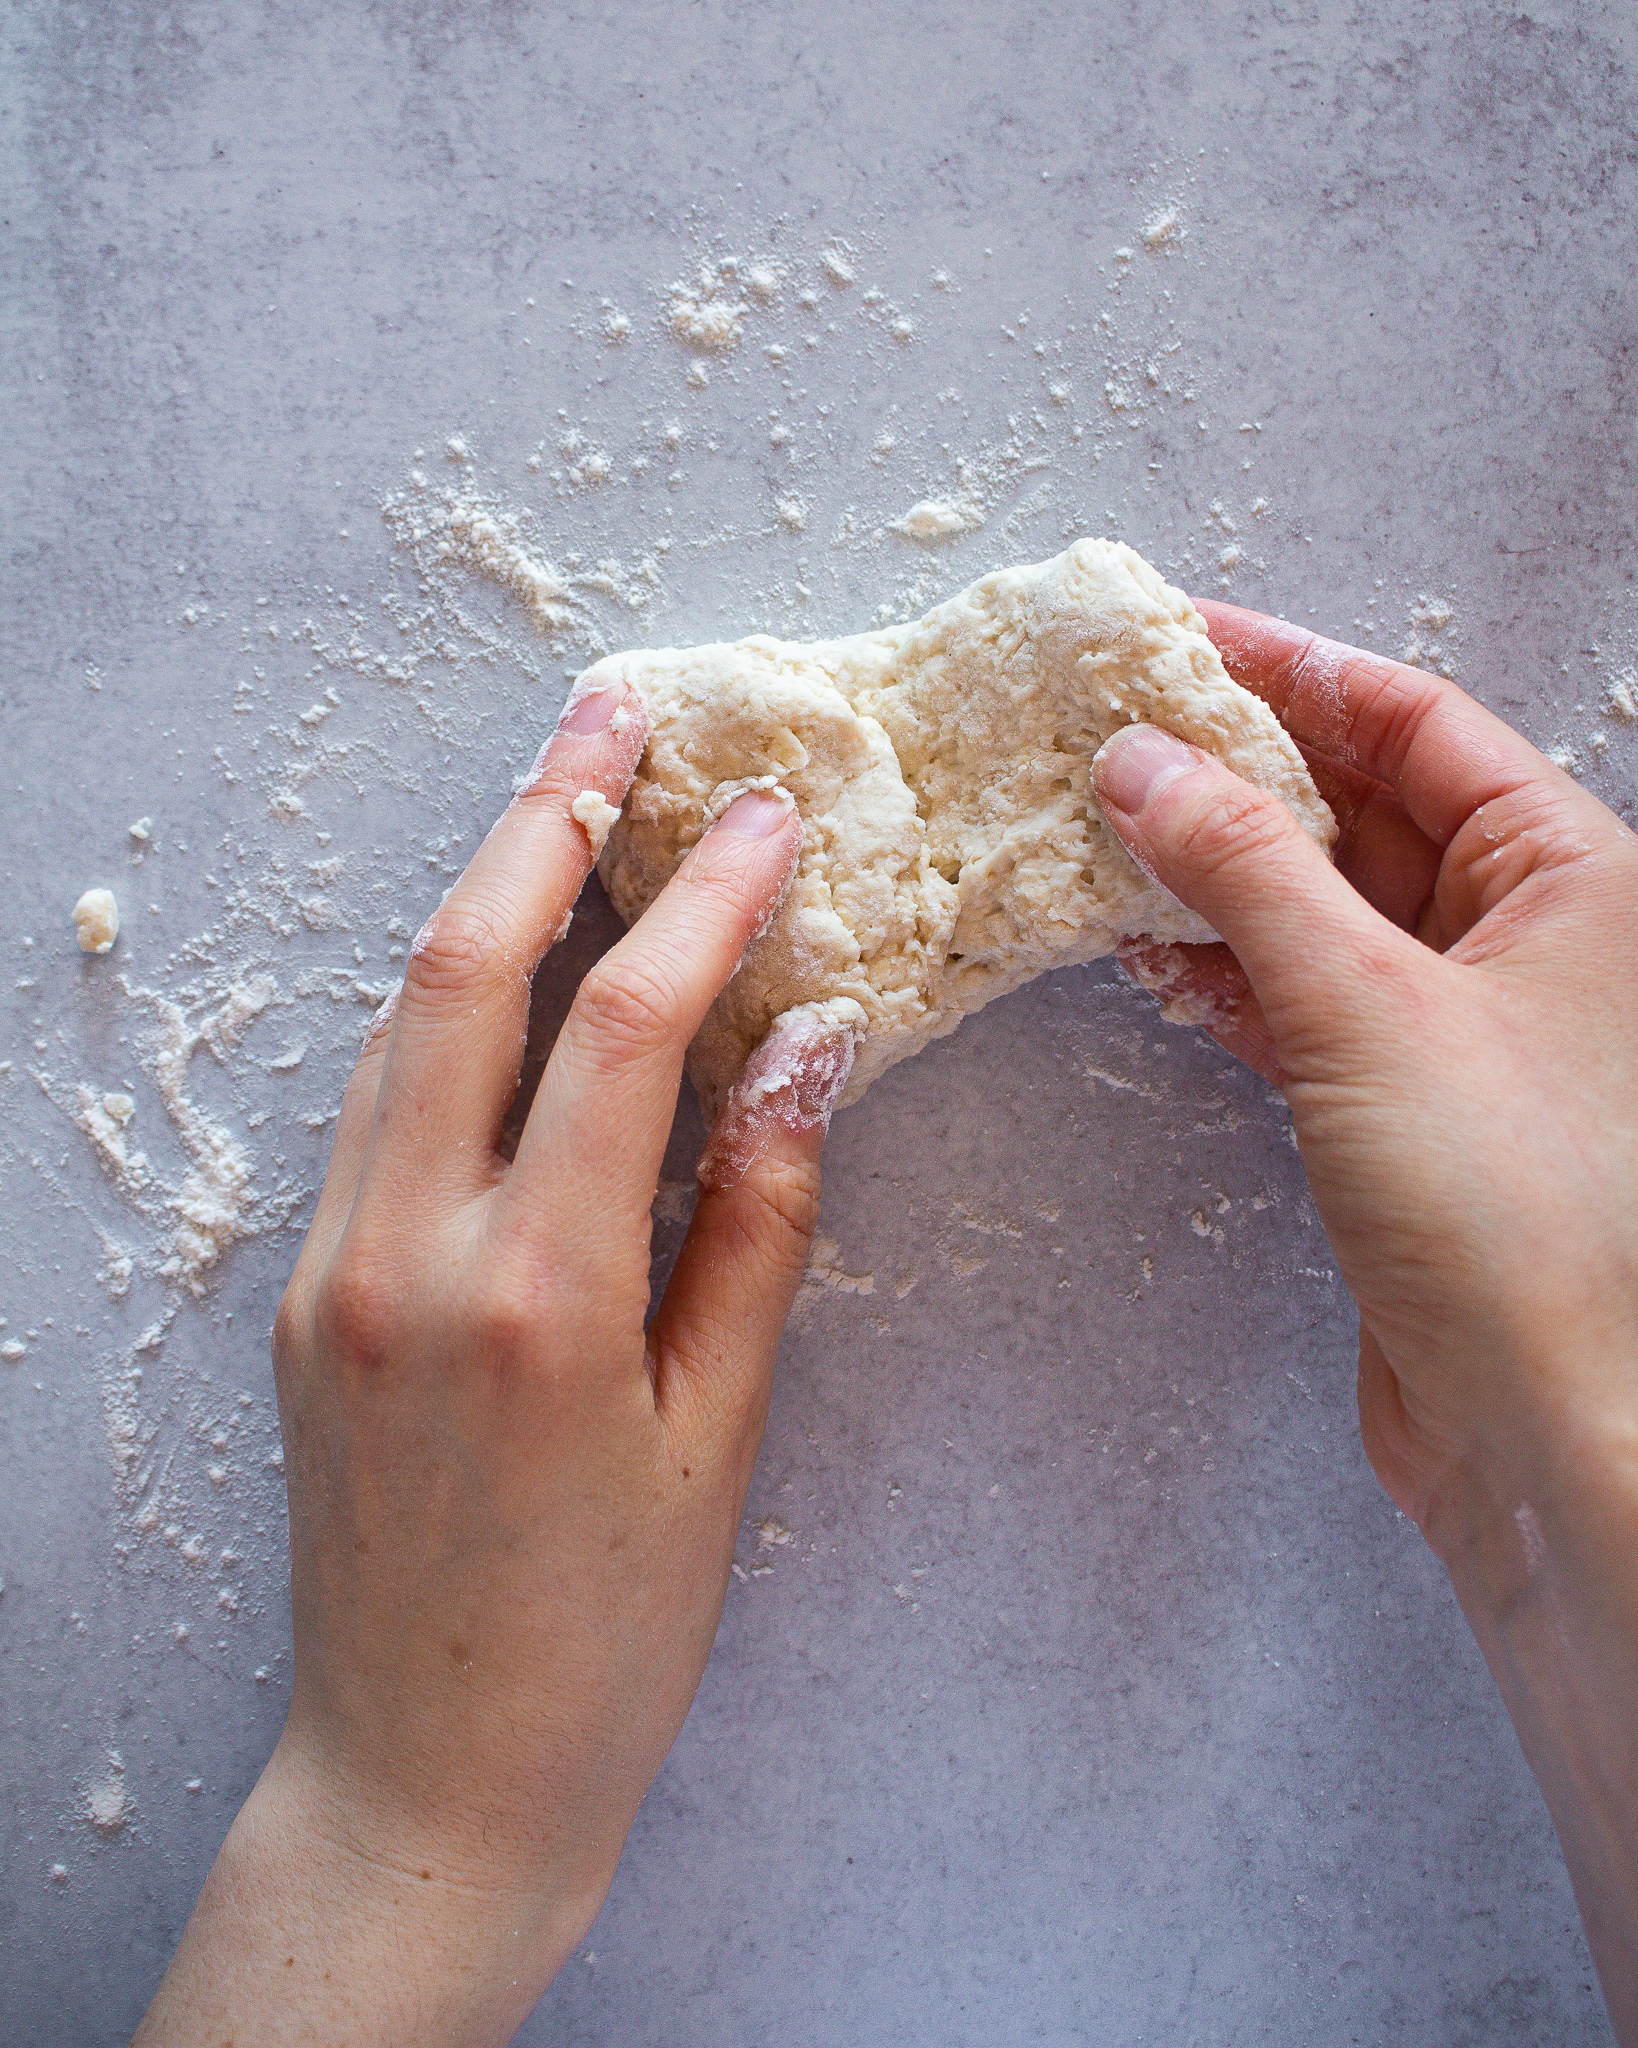
Now it is time to form the final biscuit! Your surface flour should be mostly gone, so we will use this to our advantage.
The bottom of the biscuit should now be kind of sticking to the surface, and that’s a good thing! It will help us shape the final product.
What we want to do is rotate the dough into a circle, then leaving it on the counter, gently pull it towards us. Kind of like shaping a bread loaf. The bottom of the biscuit will hold to the surface, but tighten when we pull it.
If we rotate and repeat, this will help the dough form into one biscuit sized ball.
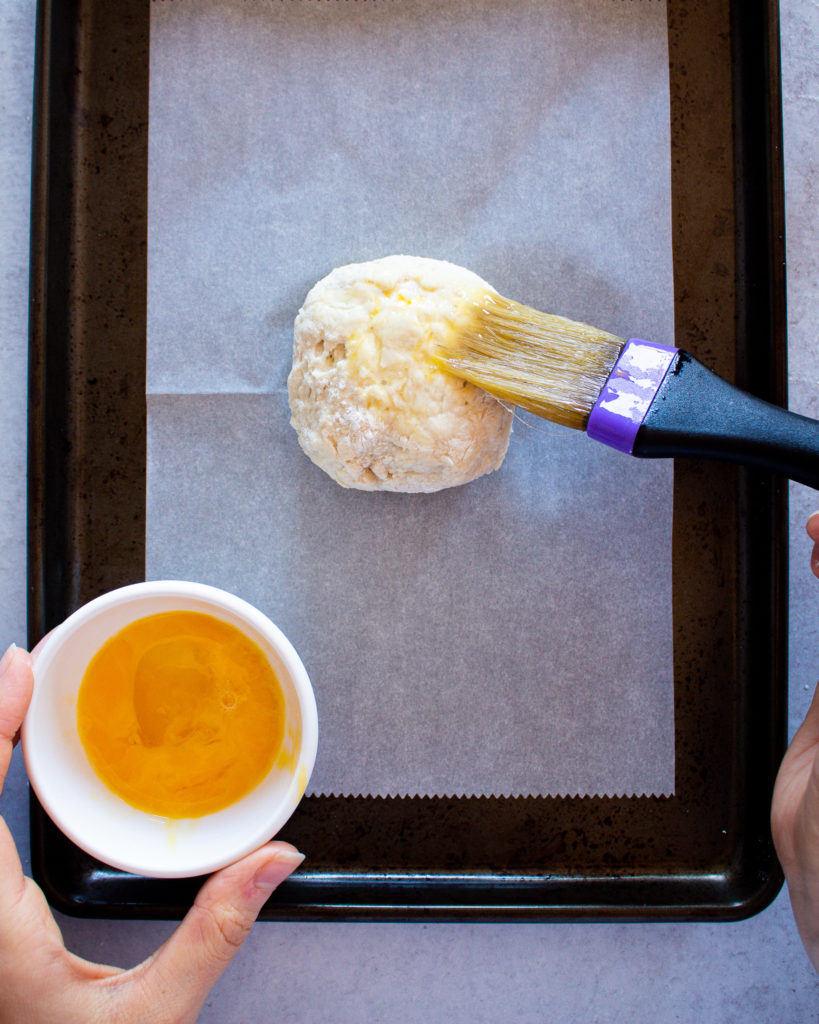
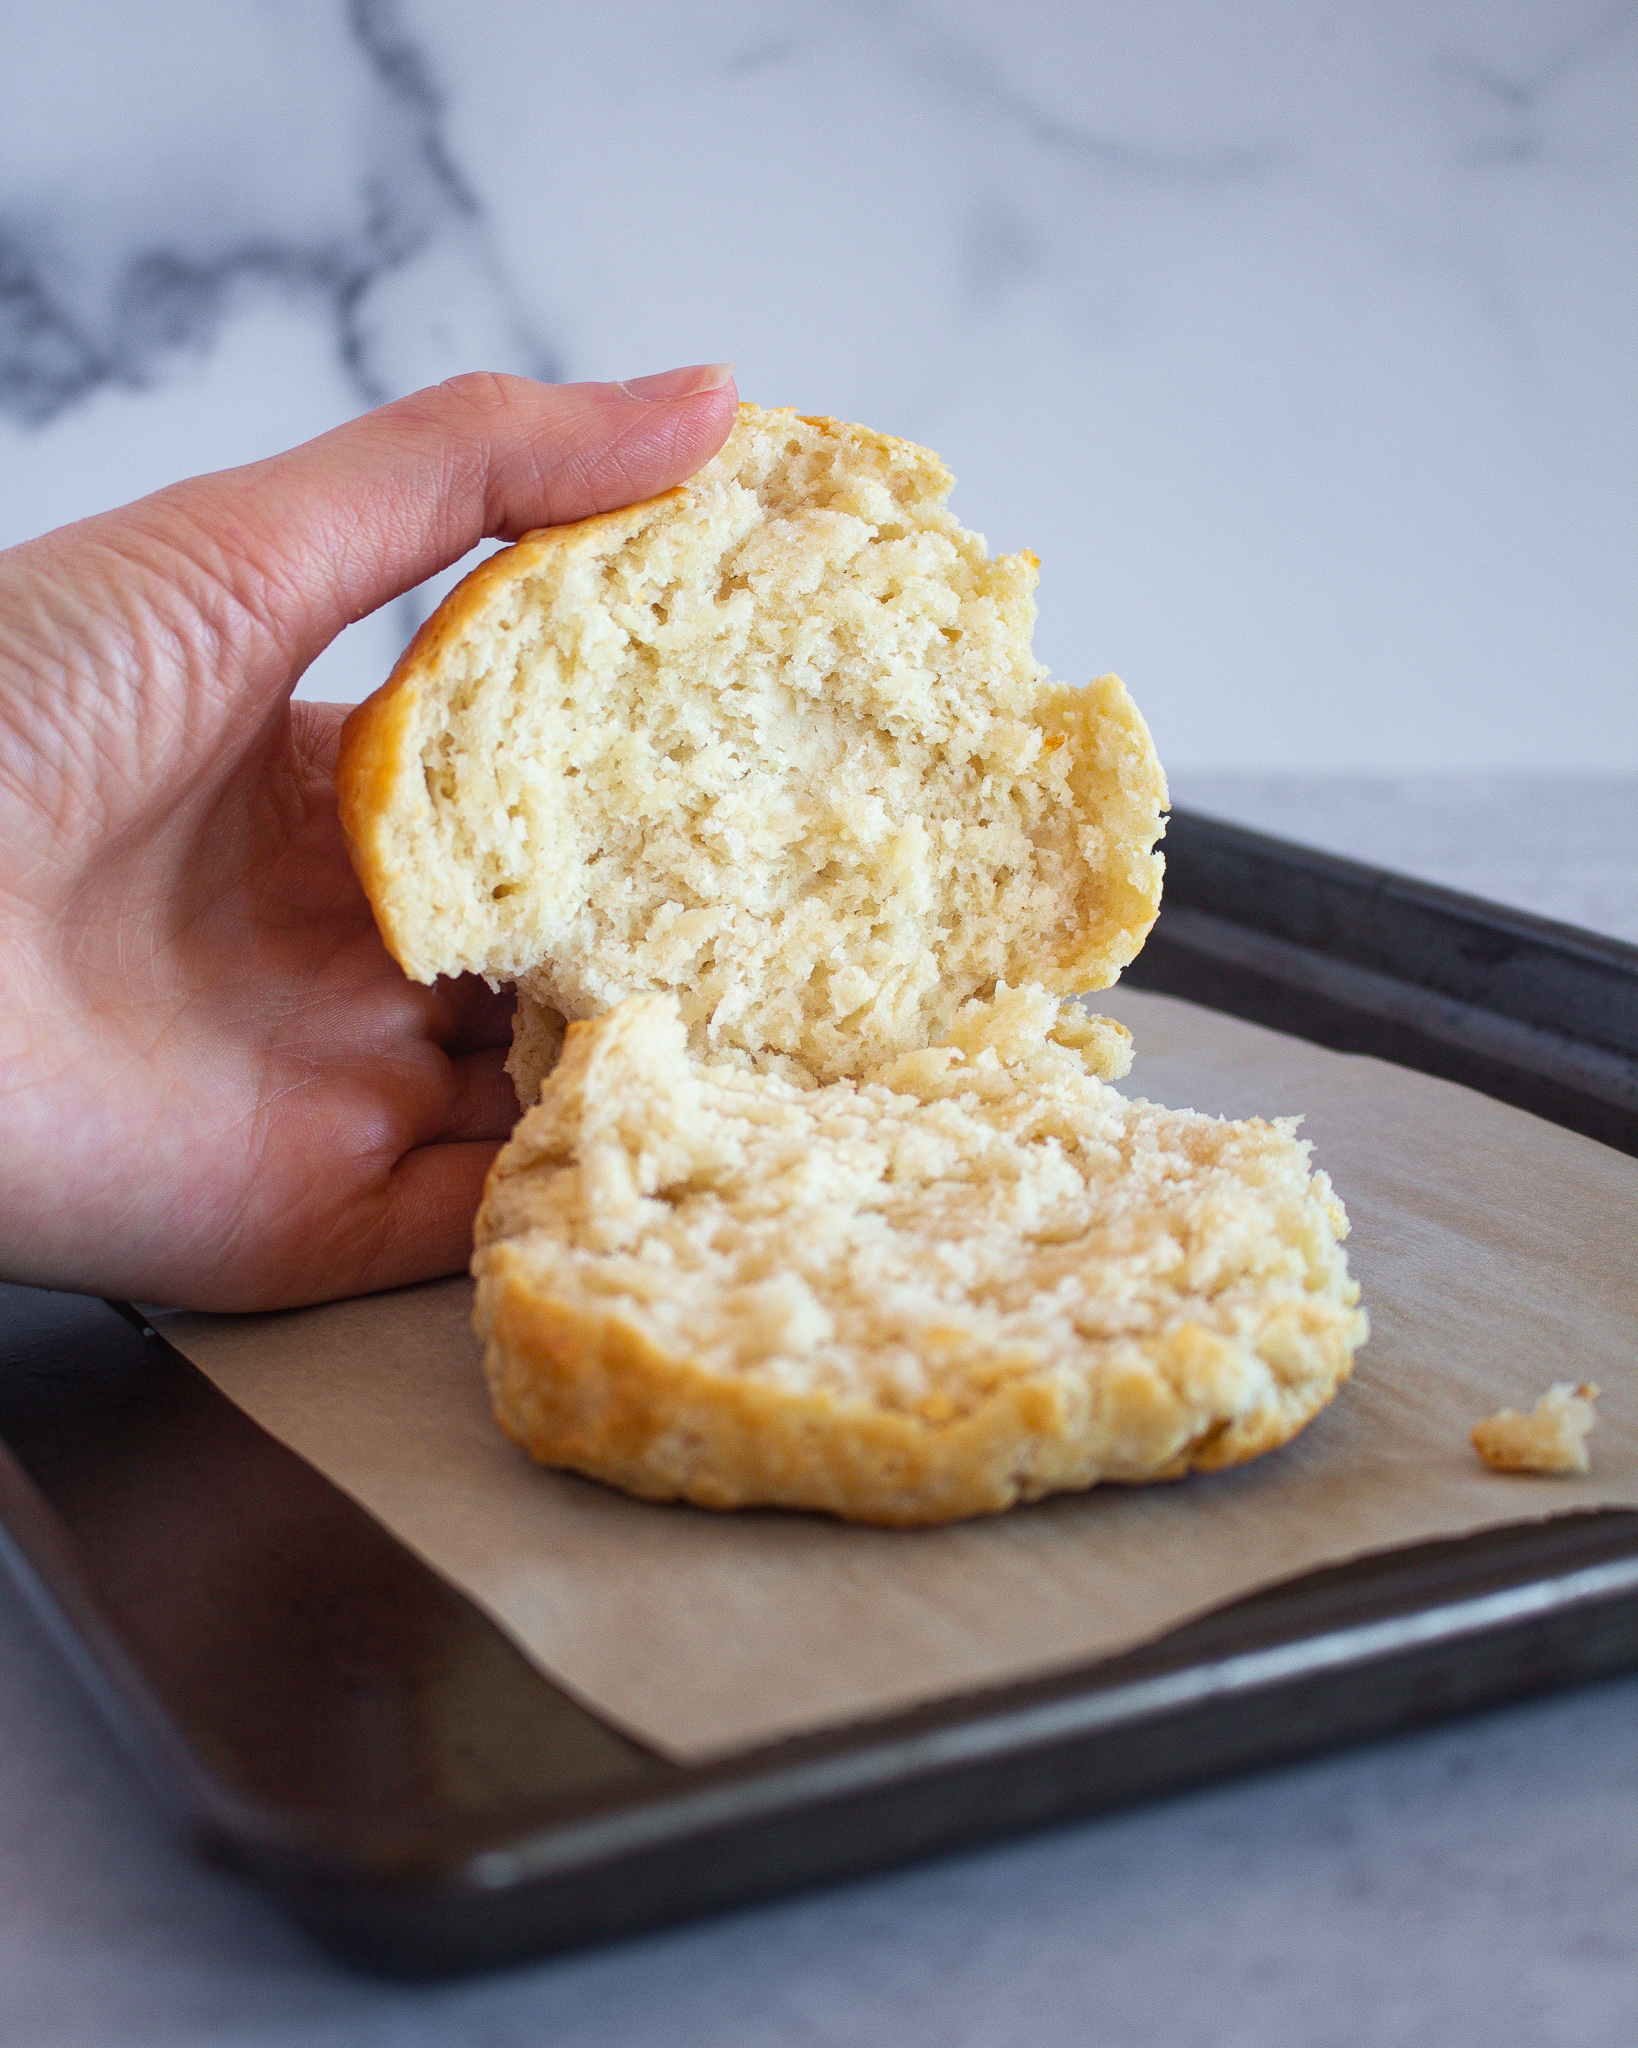
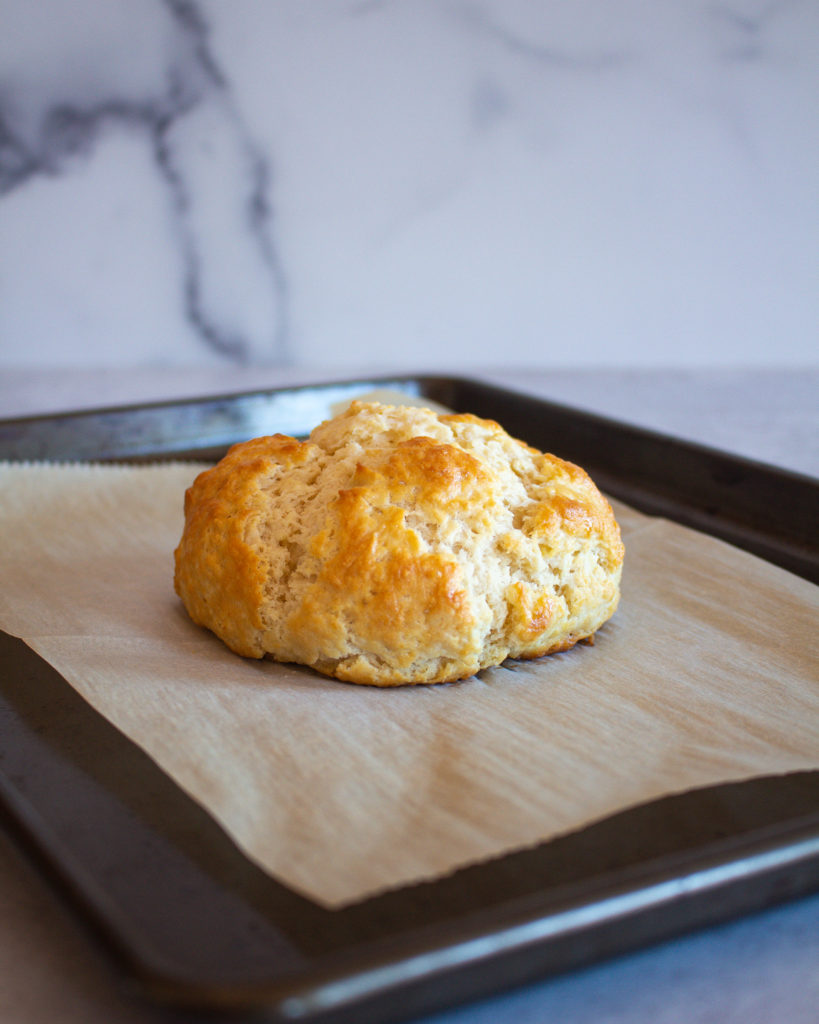
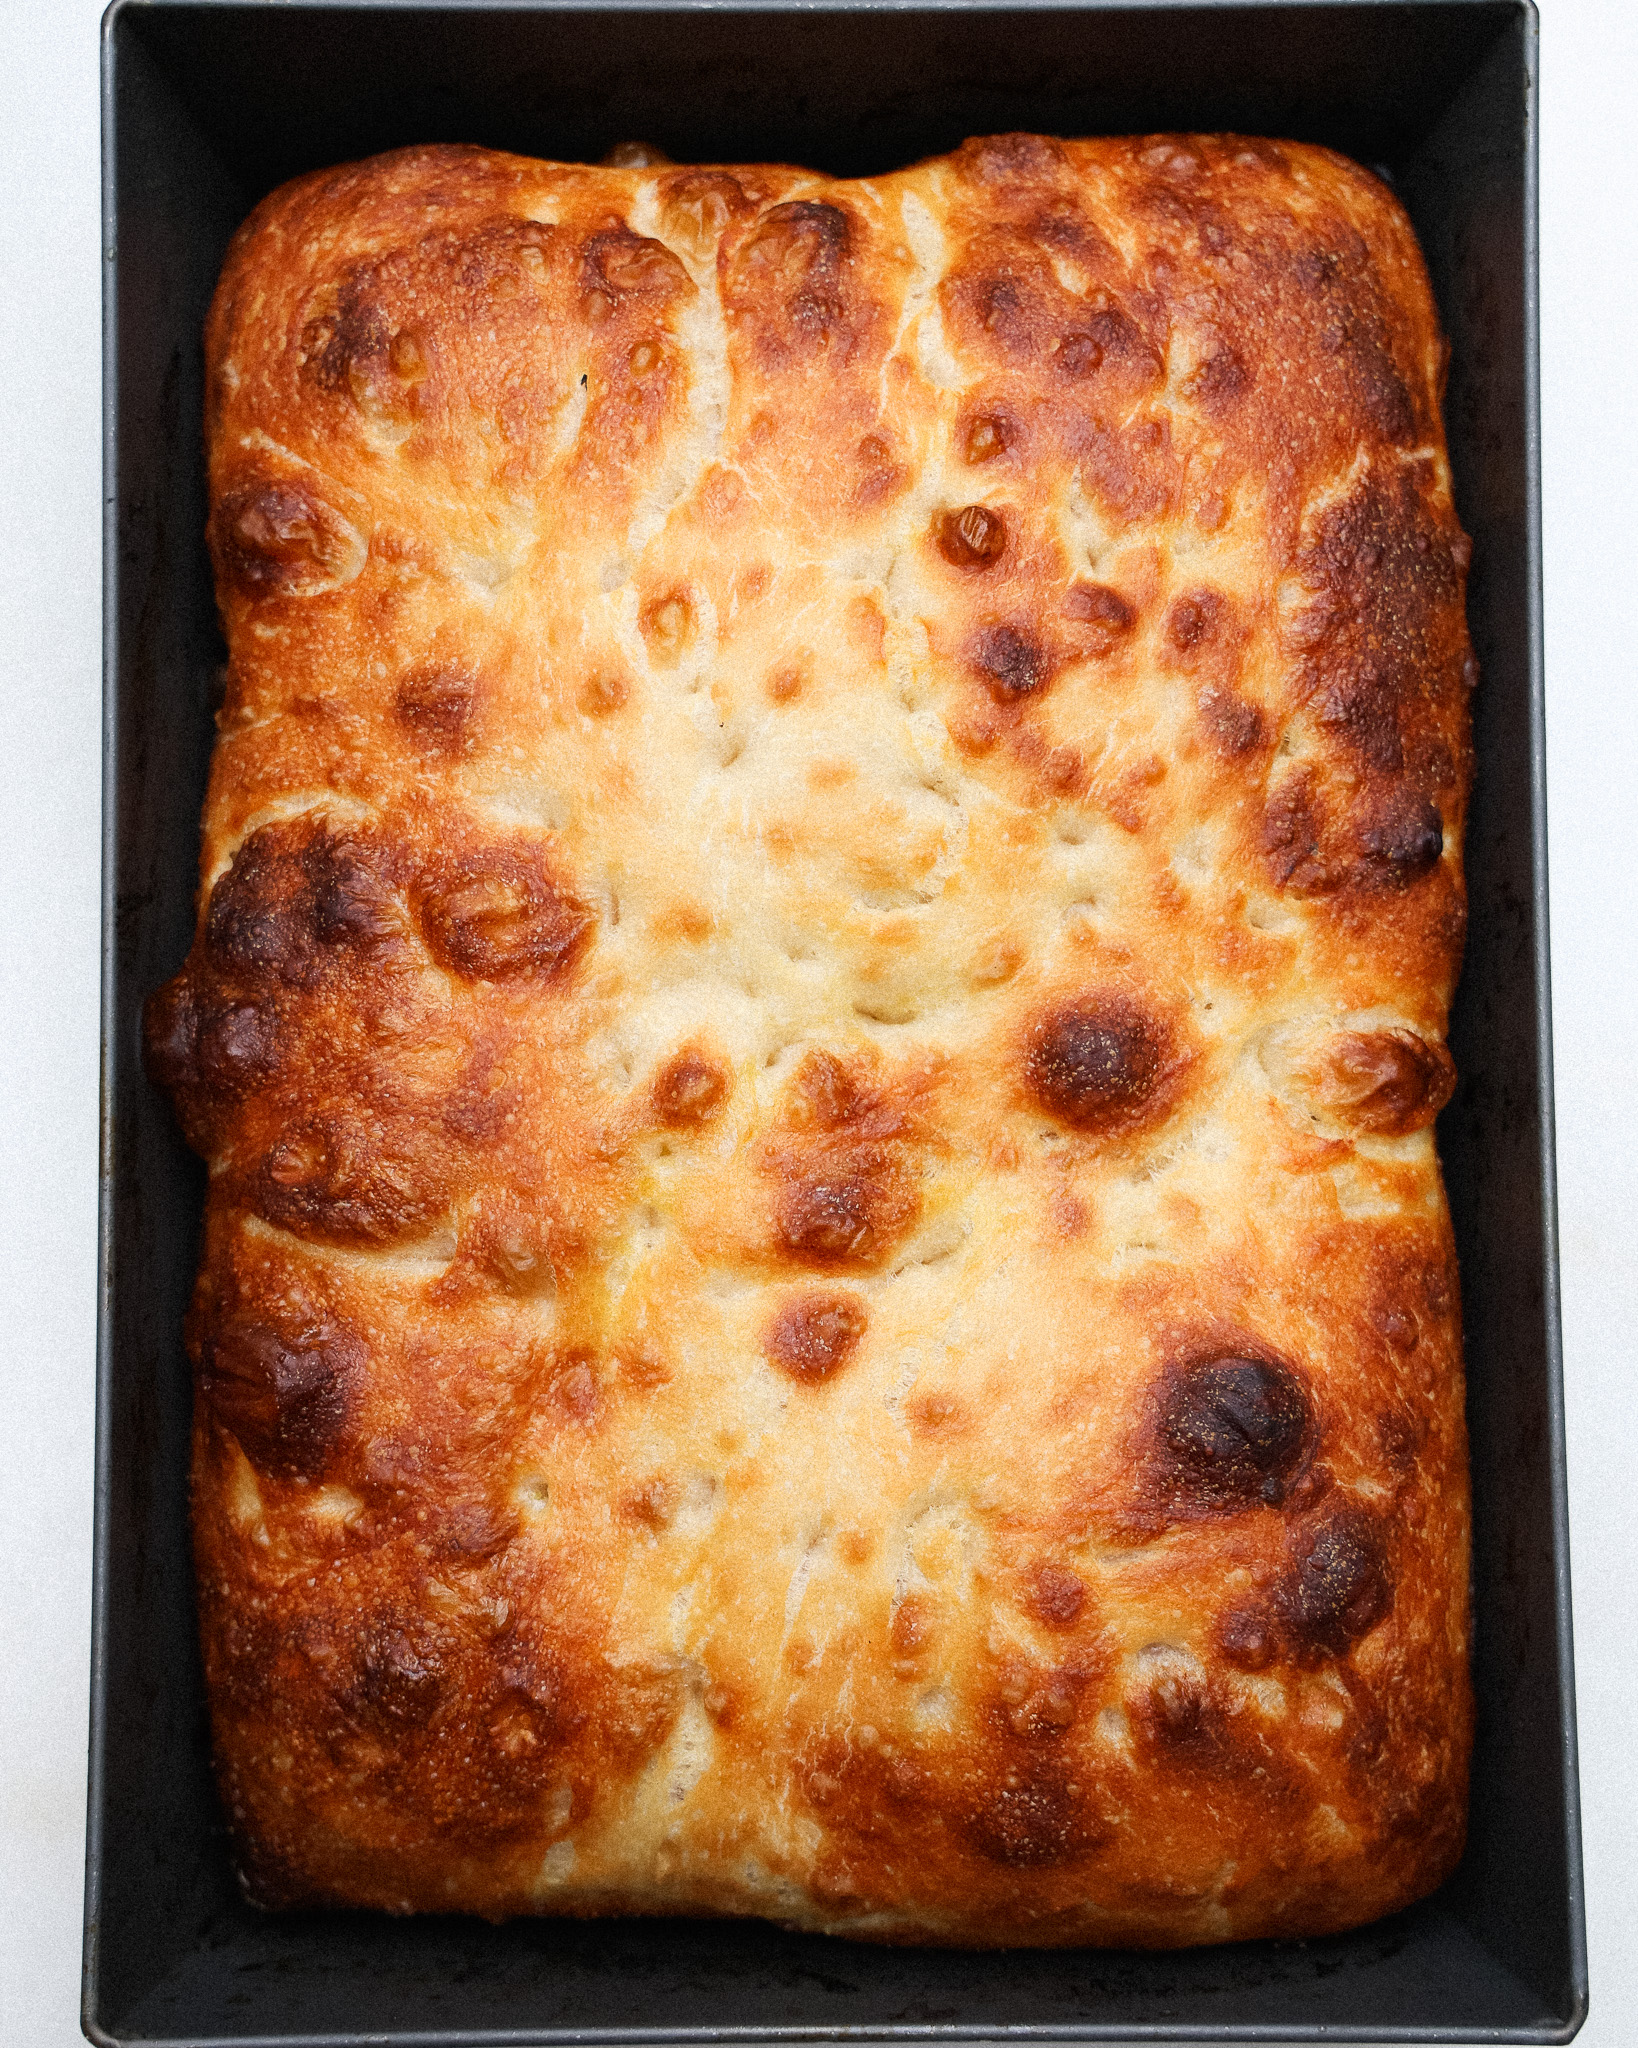
After that you can brush with egg wash (if you aren’t vegan) or melted vegan butter and bake at 425F for 12-15 minutes!
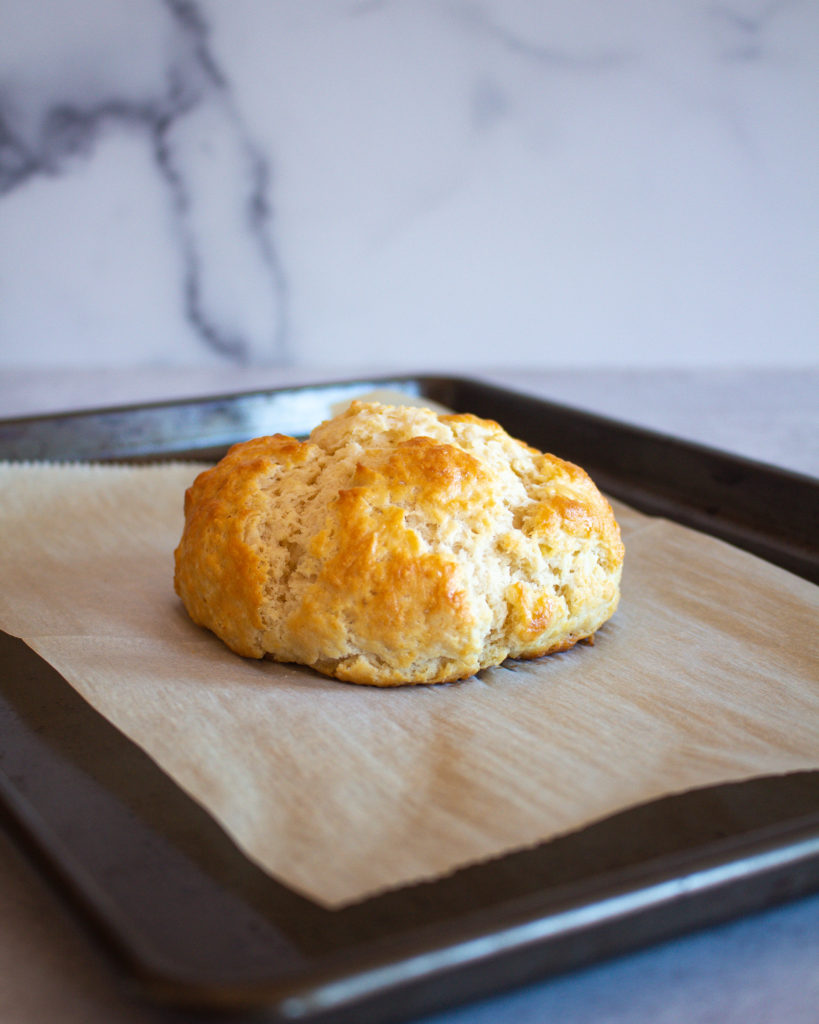
The biscuit should double in size, come out of the oven piping hot and be the best singe-serving buttermilk biscuit you’ve ever made.
Of course, if you have any questions feel free to leave them in the comments. And happy baking 🙂

Ingredients
- 70 grams all-purpose flour, about 1/2 cup, plus more for dusting
- 1/4 tbsp baking powder
- 1/4 tbsp granulated sugar
- 1/4 tsp salt
- 2 tbsp FROZEN unsalted vegan butter, I used Country Crock Plant-based
- 3 tbsp ICE COLD almond milk or oat milk
- 1 tsp MELTED vegan butter, for brushing, an egg wash will also work
Instructions
- Preheat your oven to 425F.
- In a large bowl, whisk together the flour, baking powder, granulated sugar and salt.
- Use a box grater to grate the butter into the flour. Once grated, toss with your fingers until all the butter pieces are coated in flour. After the pieces are coated, mix with your fingers until no piece of butter is bigger than a lentil.
- Using a fork and whisking constantly, gradually drizzle in the ice cold milk. Whisk until you get a rough dough, then switch to using your hands to bring the dough together. Try to use your hands as little as possible in order to keep the dough cold!
- On a lightly floured surface, pull the dough out to a rectangle shape. Do a tri-fold as outlined in the photos above. Fold one third of the dough into the middle, and then fold the other third on top of it. Rotate the dough 90 degrees, flatten out into a rectangle and repeat the process 2-3 more times. Try to use as little flour as possible.
- Once you've done a few folds, use both hands to gently rotate the dough and then pull it towards you. Most of the flour on the counter should be gone, so the bottom of the dough should lightly stick, and when you pull it towards you it will tighten. This is to tighten up the bottom of the biscuit and create a circular shape.
- After your biscuit is formed, put it on a parchment lined baking sheet and brush with more melted vegan butter or egg wash if you are not vegan.
- Bake at 435 for 12-15 minutes or until golden. Serve and enjoy!


Comments
How do you think this would work with a 1:1 gluten free flour?
I personally haven’t tried it, but I believe it should work! Especially since this dough is designed to be flakey and tender and doesn’t need the stretch from traditional gluten flour.
Ok so next-the sausage gravy part? Btw this was delicious. Thank you. And I’m still happy about the Tate’s recipe. My fave-which is no longer-was the chipless variety. Which I can now make anytime Thank you!
I’m so glad you liked it! And yes, the gravy is on its way!
Do you think this could work in the air-fryer? I’d be curious to try it and get an extra crispy biscuit!!
An air fryer works like a convection oven – so it should work if you set it to 25 degrees lower than the recipe calls for! I’m excited to see how it turns out, let me know!
Leave a Comment
Made this recipe? Tell me all your thoughts or if you’ve got any questions!